From dissolving skittles to water drops on CD’s
Finding something creative to do when it is hot, or rainy, or snowy, or you just want to stay home, can be a real challenge! It’s been a while since I shared some creative at-home projects, so here are 7 for you to experiment with.
As I find myself expanding my stock photography portfolio, projects like this are great for gathering more images to publish! But, they are also just plain fun to do if you are feeling bored.
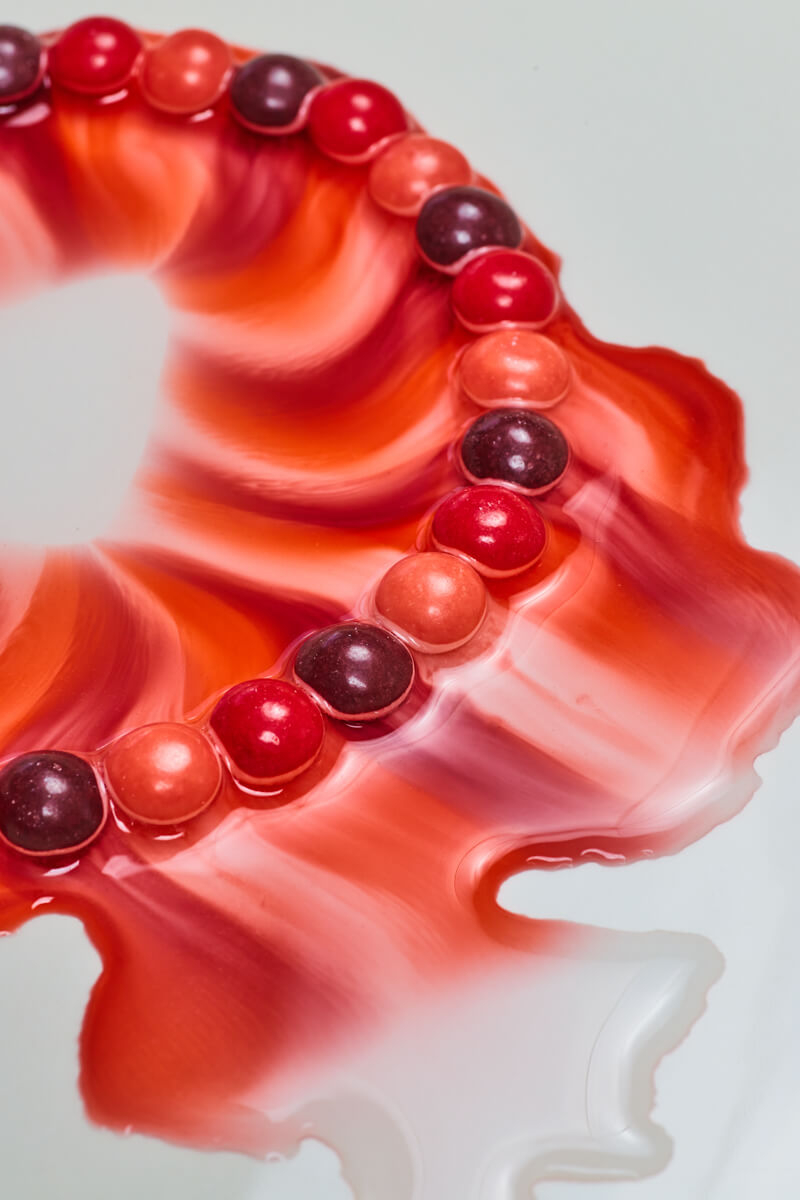
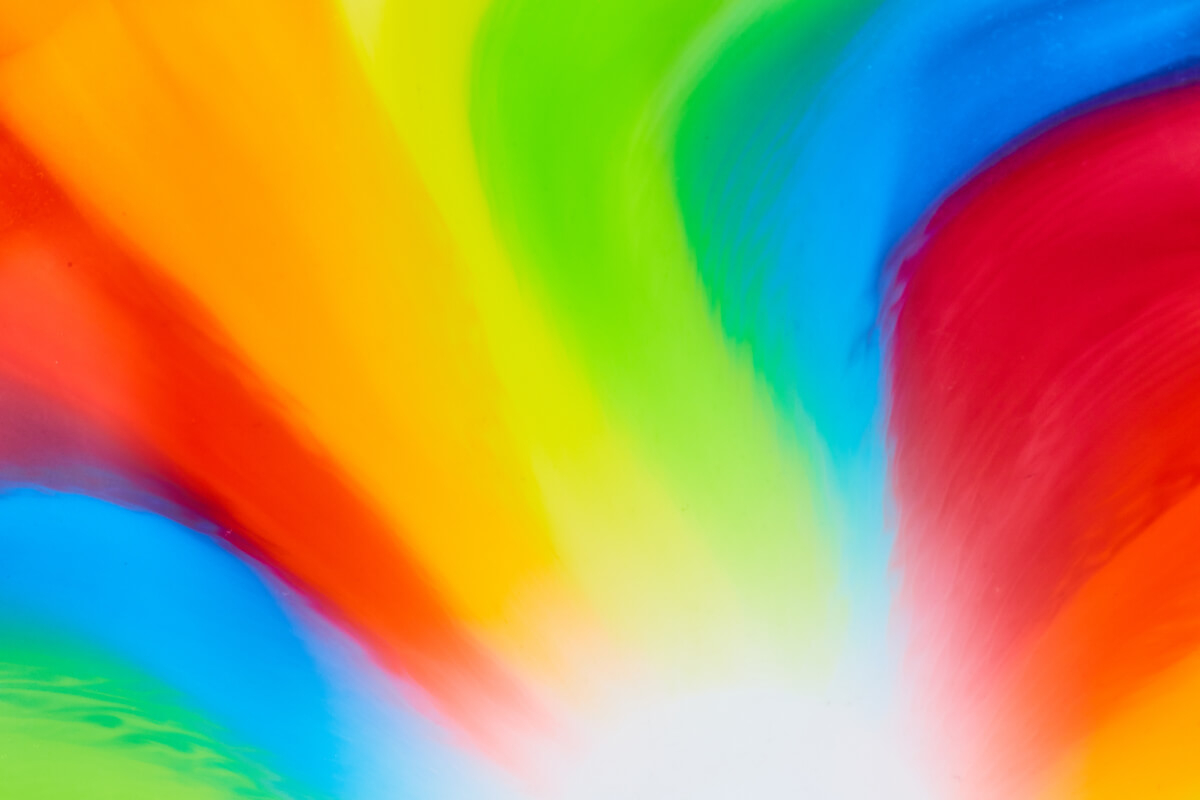
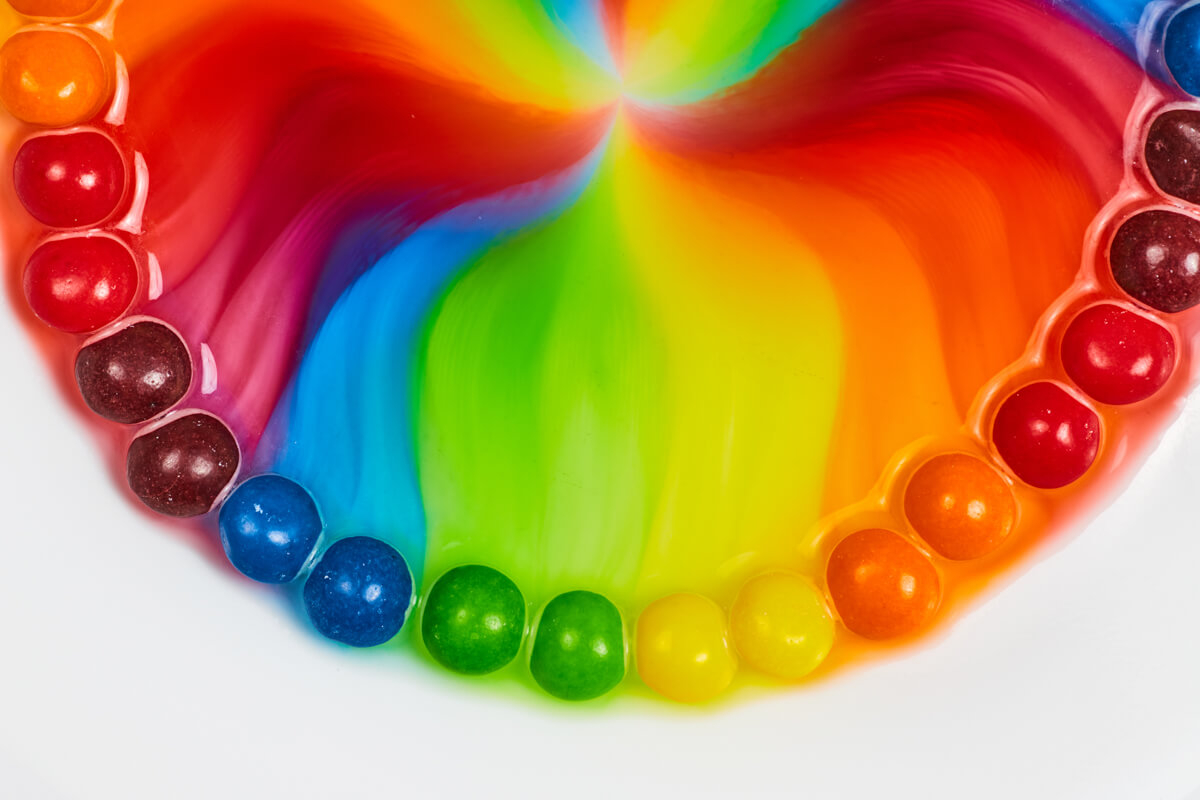
1. Skittles and Water
I experimented with this back in 2018 for the first time, and I was surprised how well received they were across stock websites. It took me some time, but I knew I had to revisit this fun experiment! Even if you AREN’T taking photos, this is a great project for kids as well.
All you need is a plate, some skittles, and some water! We’re starting out super simple for you. Just put your skittles on the plate in any arrangement, though a large circle works the best. You can choose whatever colors you want, but for the perfect rainbow I suggest arranging in 2 or 3 of each kind. Then, just gently pour water into the center until it reaches the skittles.
Now, you just watch and wait, as the colors of the skittles are pulled off by the water and after 3-5 minutes they will be all white on the bottom and the water will be fully filled with color!
Here are some of my favorite results:
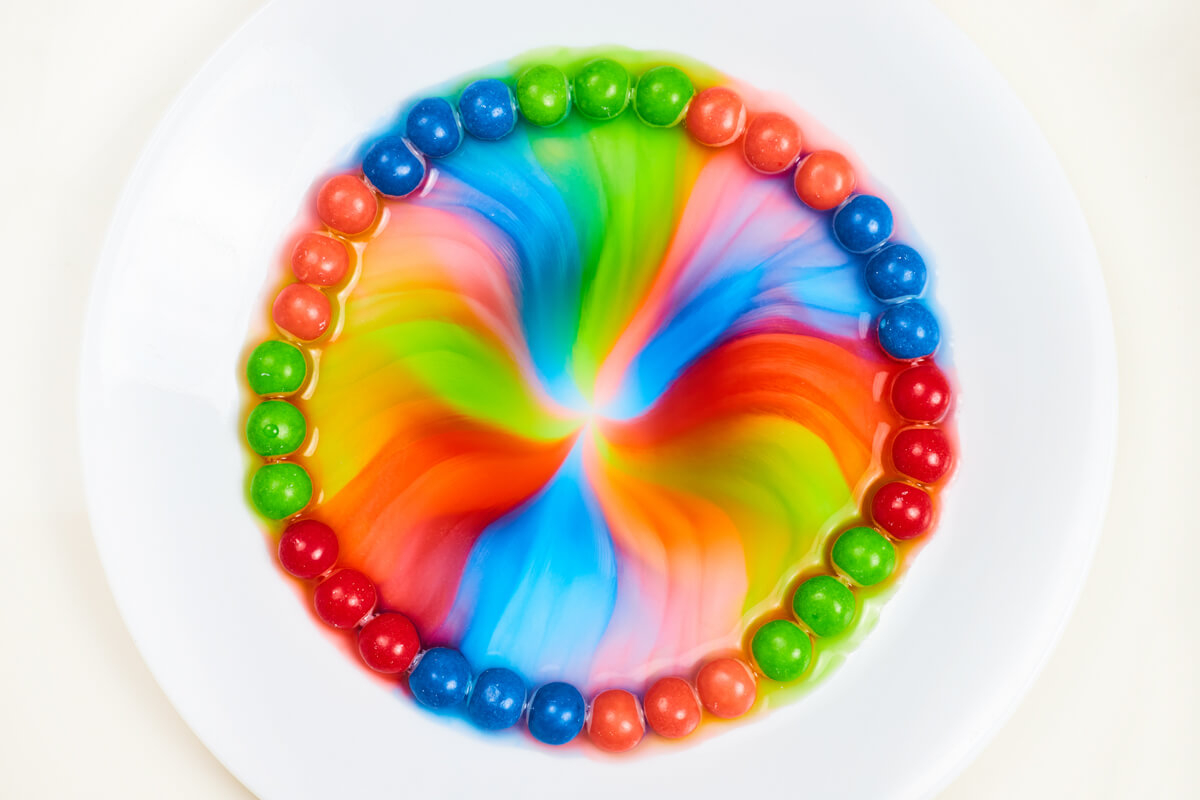
Overall setup
Selective colors - Valentines Day
Detail of rainbow
Half circle detail
Center in detail
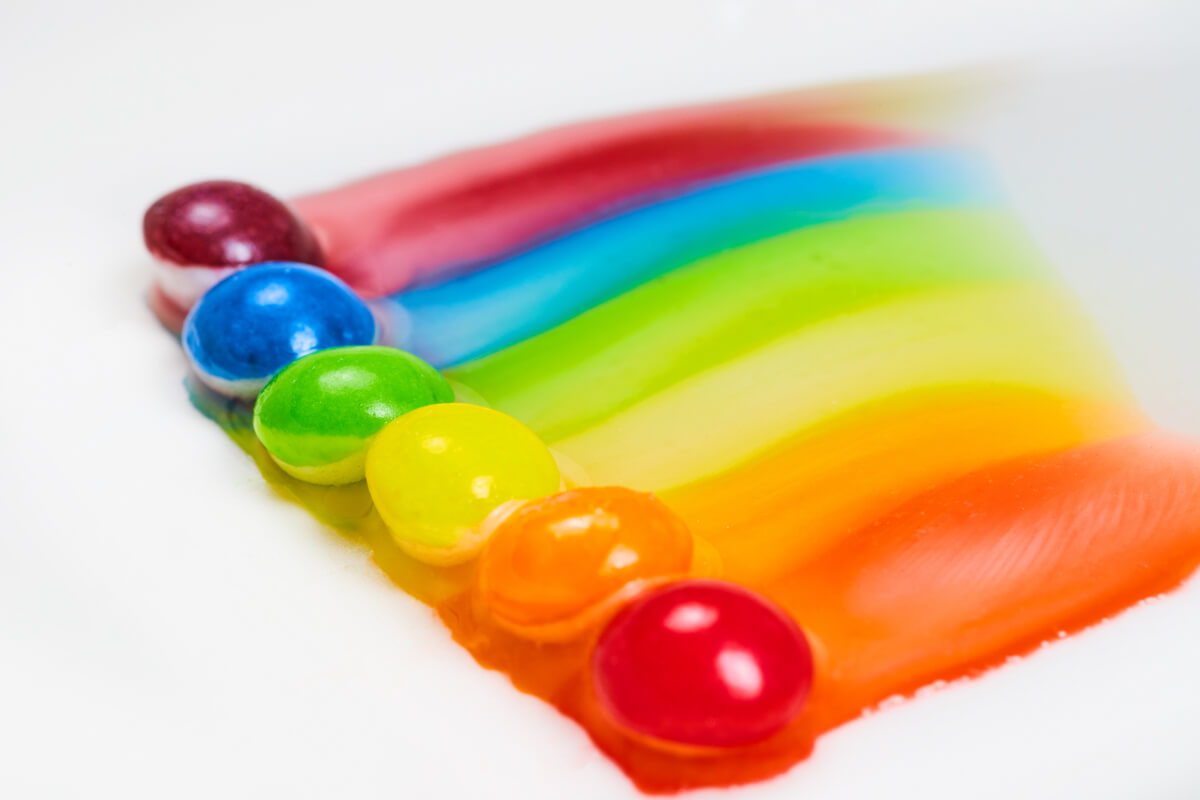
Color Strip
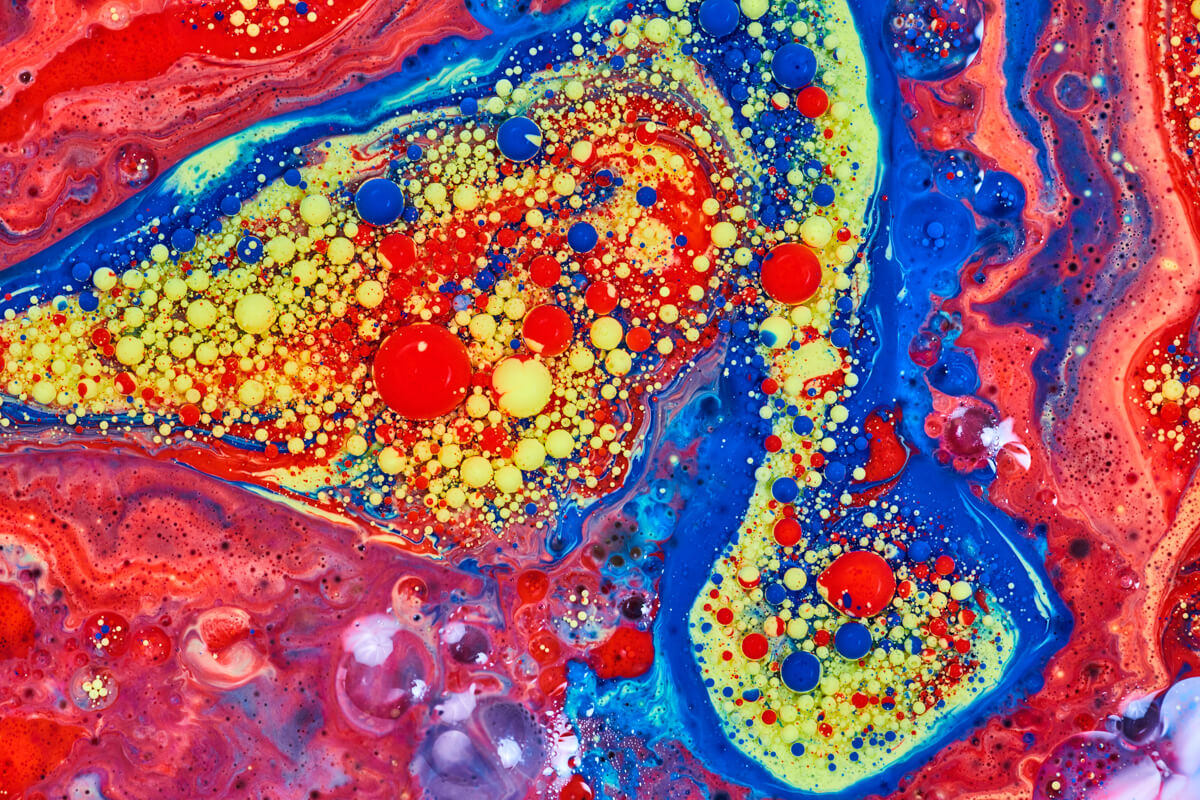
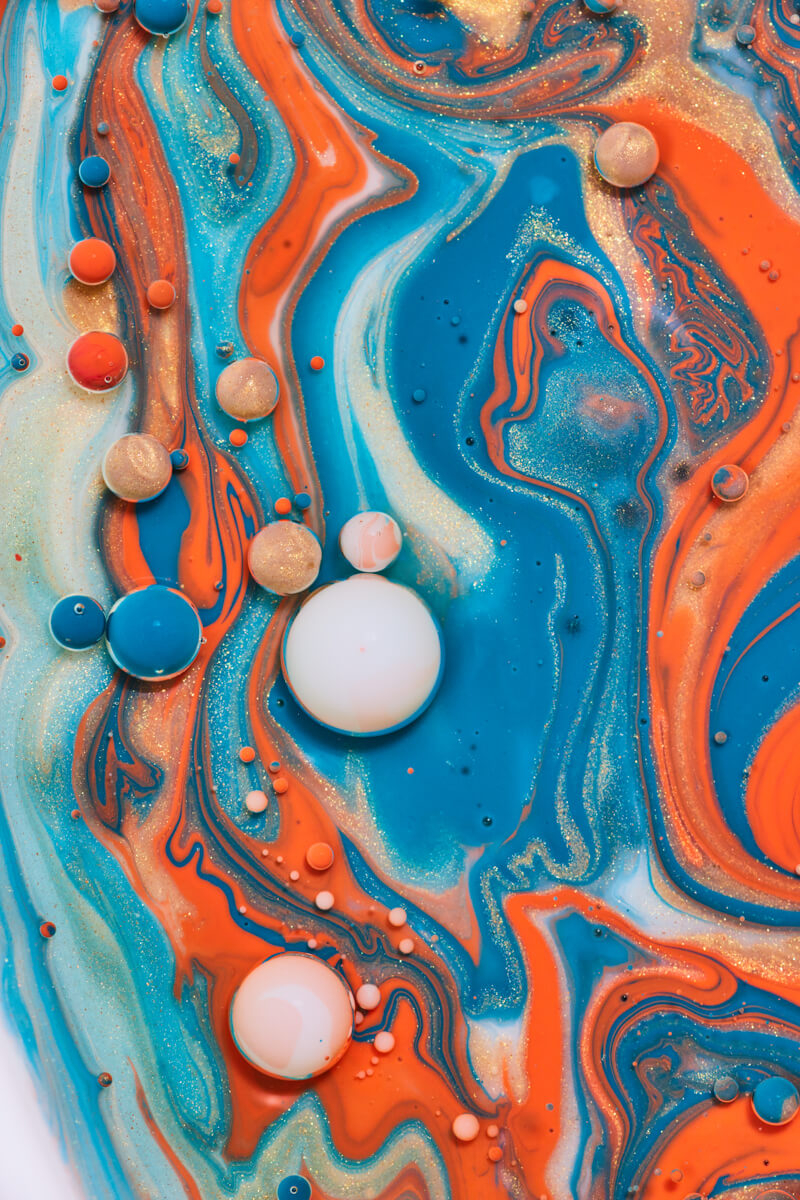
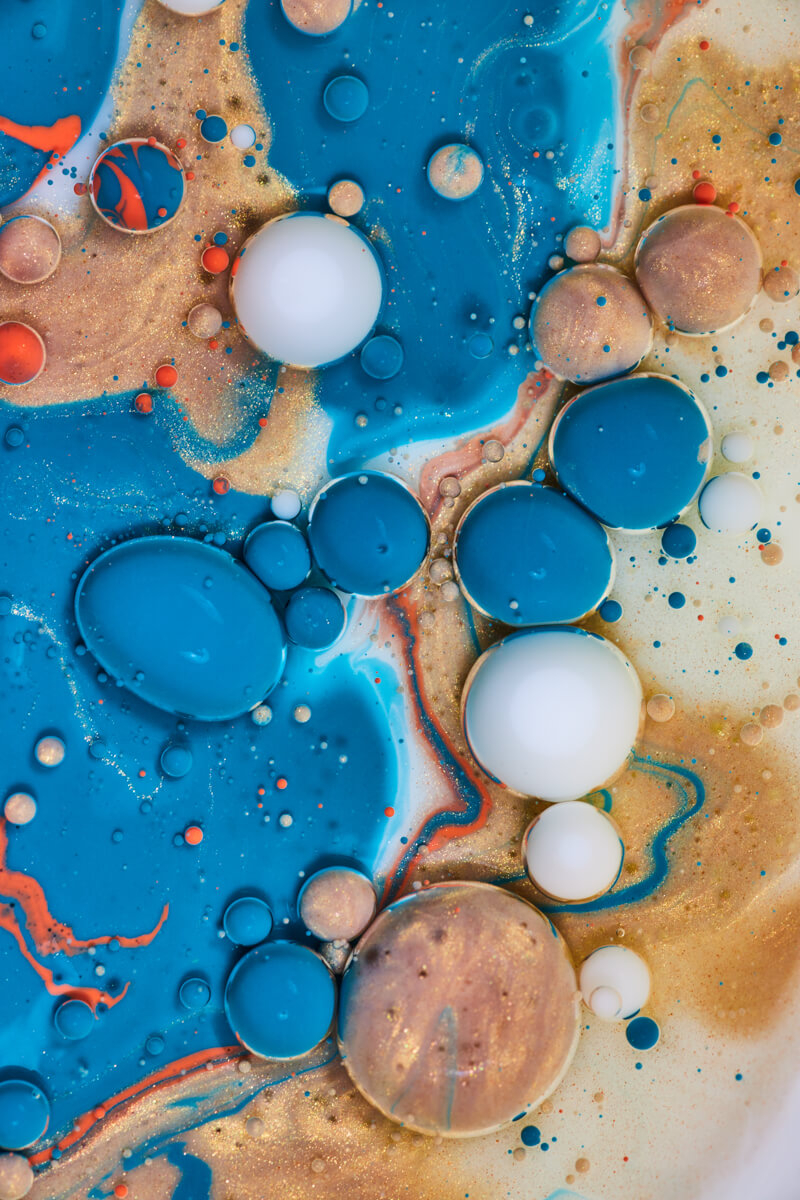
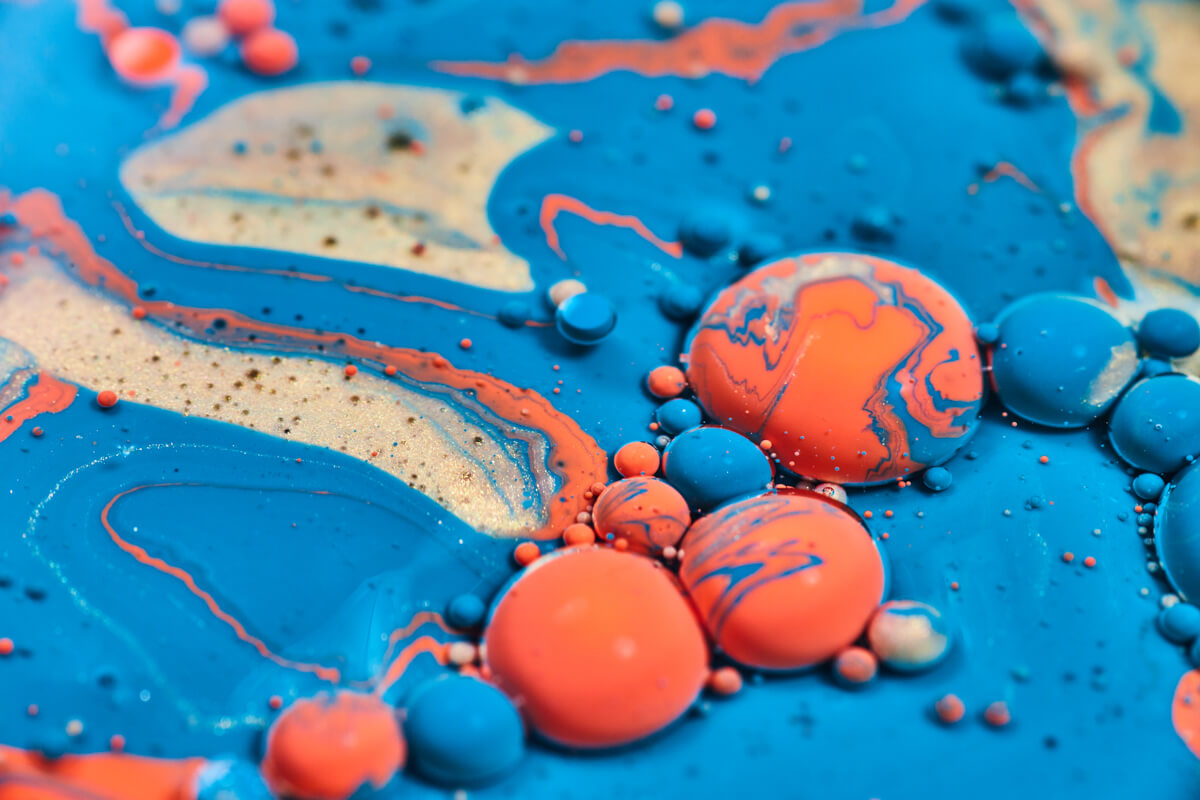
2. Acrylic Paint, Oil, and Milk
At the same time as the last experiment I did in 2018, I also messed around with this concept and have been itching to revisit it. This one is a bit harder to control, but it can produce stunning results. Core concept:
- Thin down acrylic with water with about a 1:1 ratio so it's like a thin syrup (I have been picking 3 colors and getting them prepped in 3 cups)
- Get a medium-sized bowl, add a bit of vegetable oil, and then DROP in dallops of your paint colors around it.
- Stir it gently and you may see some orbs form.
- Get a larger shallow bowl and add about ¼ inch of 2% milk. This will be your “ending” area to take photos in.
- Now, pour in your medium bowl of oil/paints into the milk and you’ll see mysterious worlds reveal themselves!
You will want a macro lens to get the tiny details in full glory, and studio lights are also great for better sharpness. Last, feel free (after taking some shots) to stir it gently to adjust it. You’re going to throw it away when you’re done anyway, so might as well stir away to see what happens. Note that it is NOT recommended to dispose of acrylic paint down the drain, so find a local disposal facility (you can always store/collect it in a milk jug until you have enough to drop off). Here are 10 tips for how to dispose of your leftover acrylic.
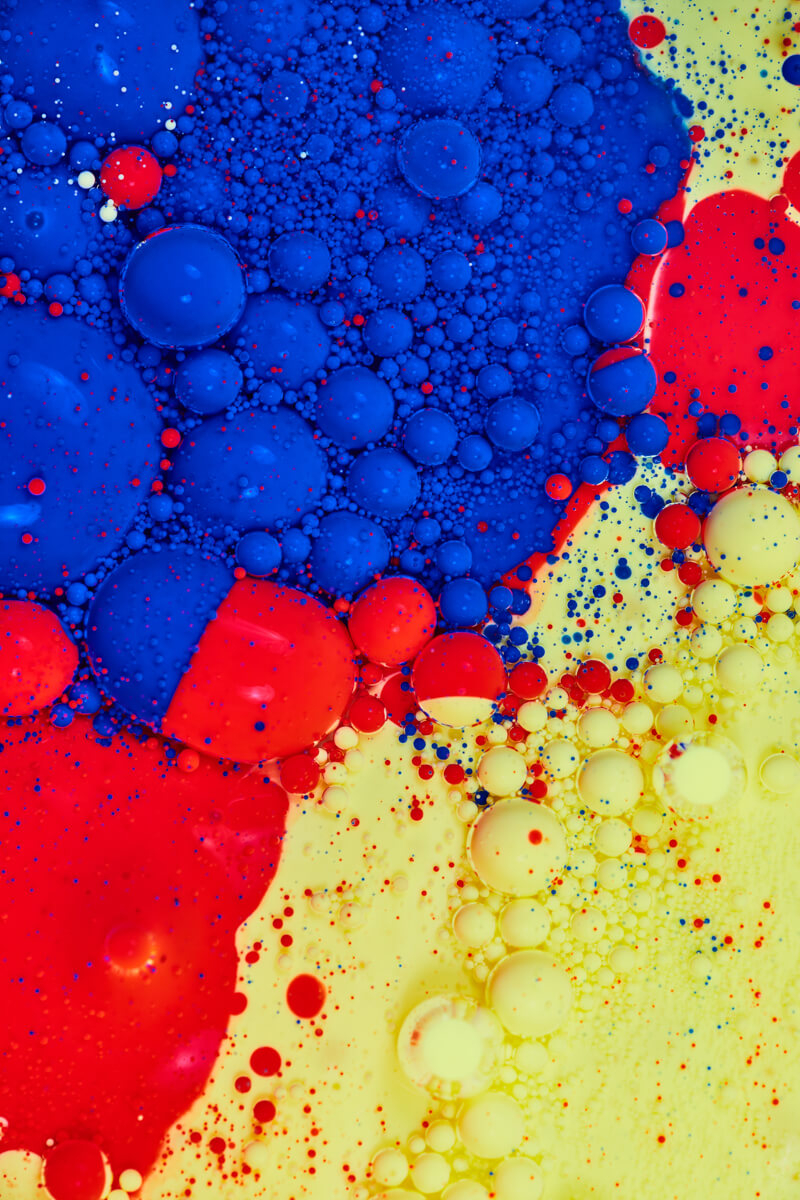
Red, Blue, Yellow
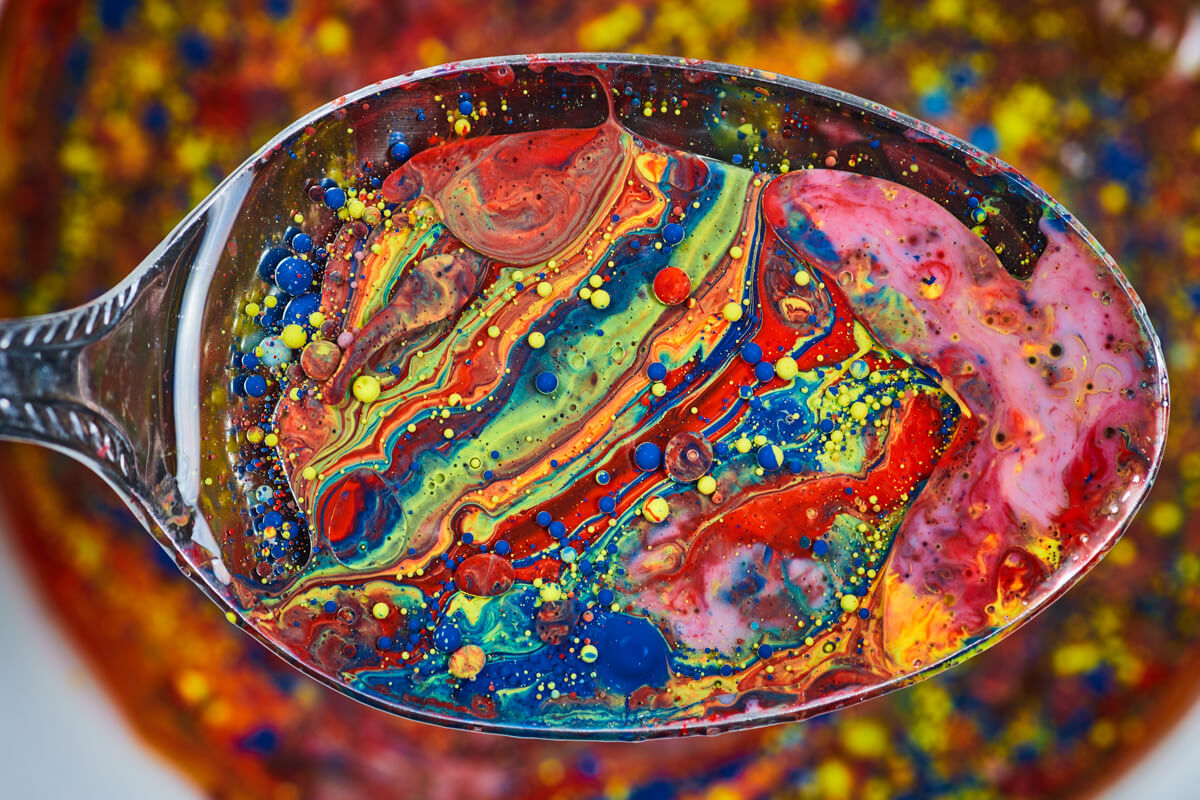
Universe in a Spoon
Galactic Swirls

Orange, Turquoise, Gold - floating in white
Orbs in shiny space
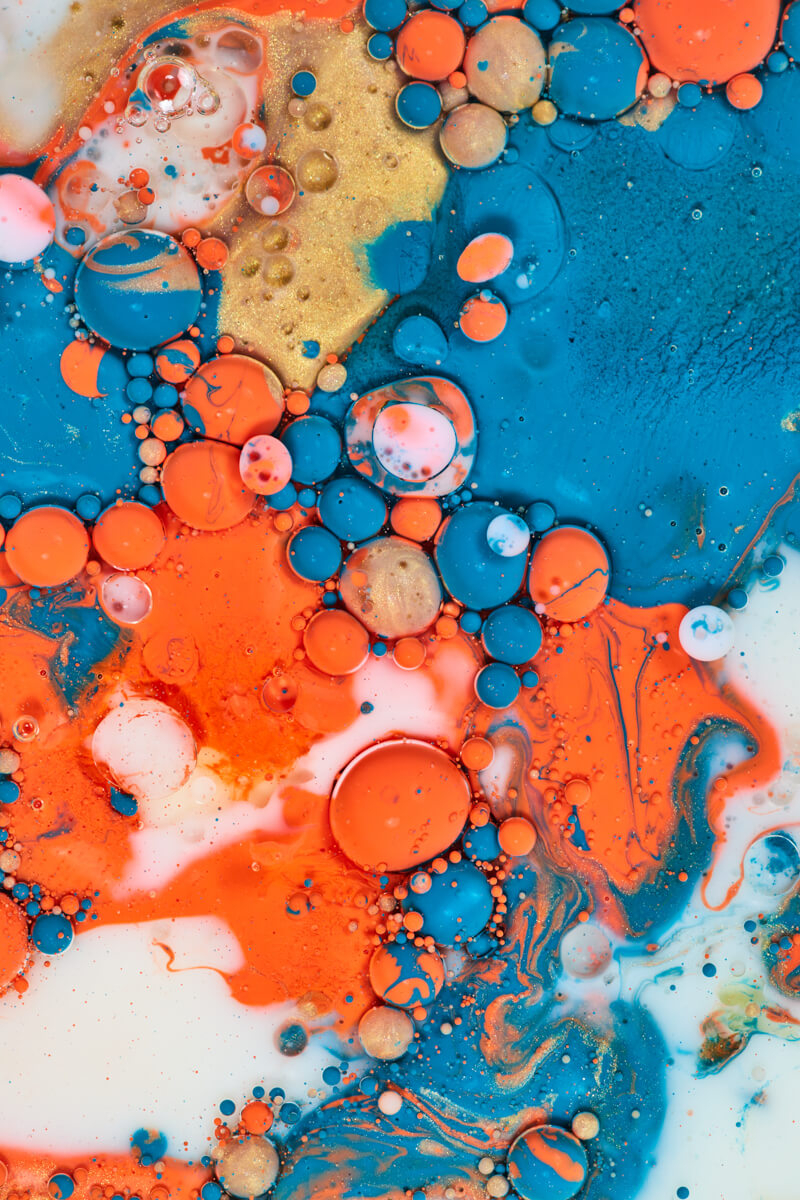
Collection of spheres
Detail of spheres
Angled shots can be fun too!
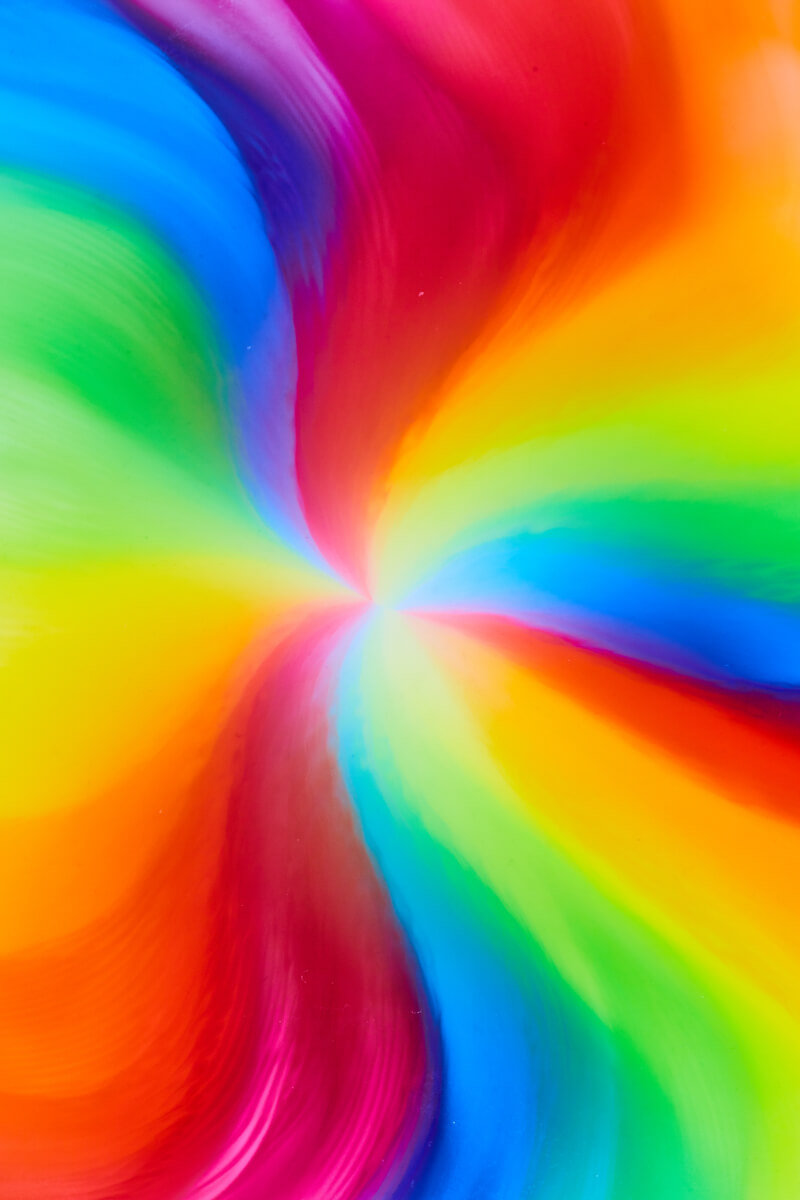
3. Tripod Blurs
Ok, that last one was probably the most complex one of the 7! Here’s a fantastically easy one to get your creative juices flowing. Mount your camera to a tripod and find a colorful scene. Now, set your camera to a longer exposure (such as 3-7 seconds) and get the rest of your settings in balance so it takes a proper exposure at that duration of your scene. Last, do this again but as it is taking the exposure, you can do a variety of shifts to create abstract images:
- Zoom fully in/out during the exposure (one or the other, mind you - and try to time it so you are moving during the entire exposure and using the full time paced with your zoom length)
- Pan left/right (producing straight lines of color)
- Pan up/down (similar to the previous, but vertical of course instead of horizontal)
- Rotate (if your tripod allows, you can rotate 90 degrees during exposure for a spiral; if NOT, you can hand hold instead and just rotate your camera 90 degrees by hand, which won’t be as clean but can produce its own unique results)
Bonus results - All of THESE examples were done with an even lazier setup as I stationed my tripod facing my computer monitor and pulled from my own images. This allowed me to pick out all sorts of colorful scenes.
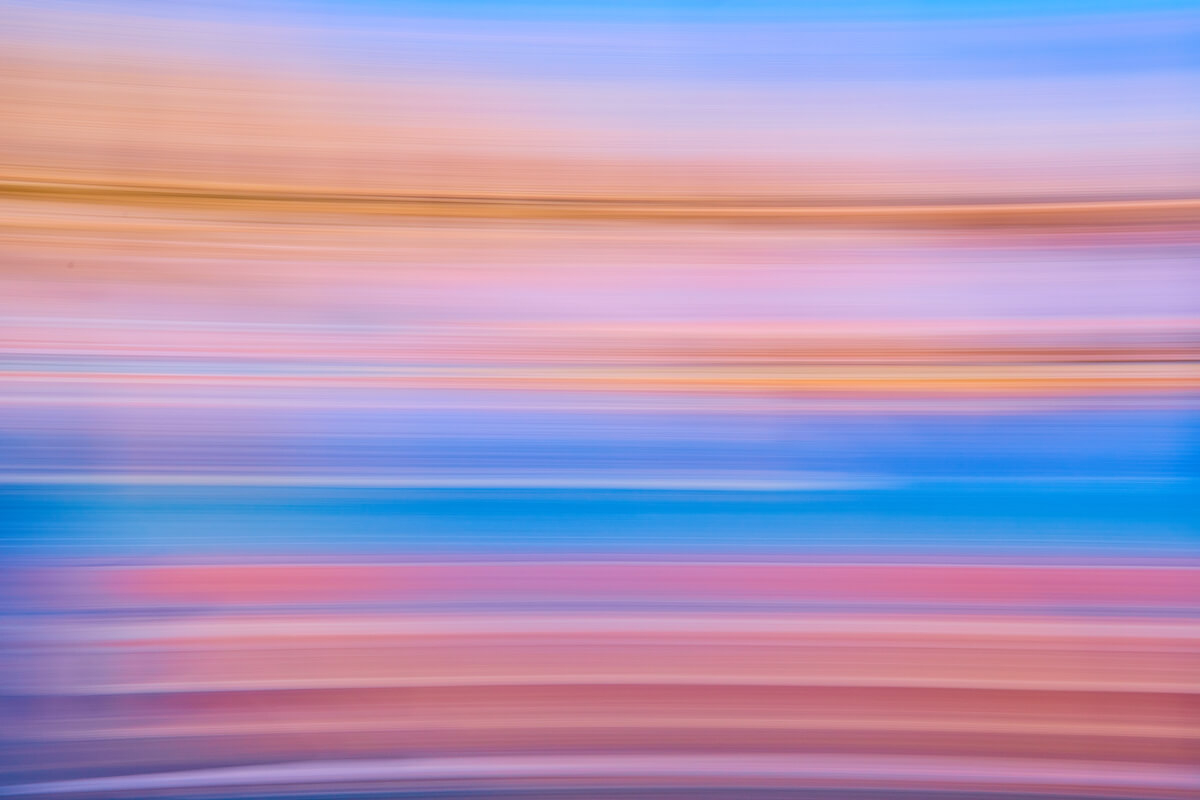
Horizontal Pan
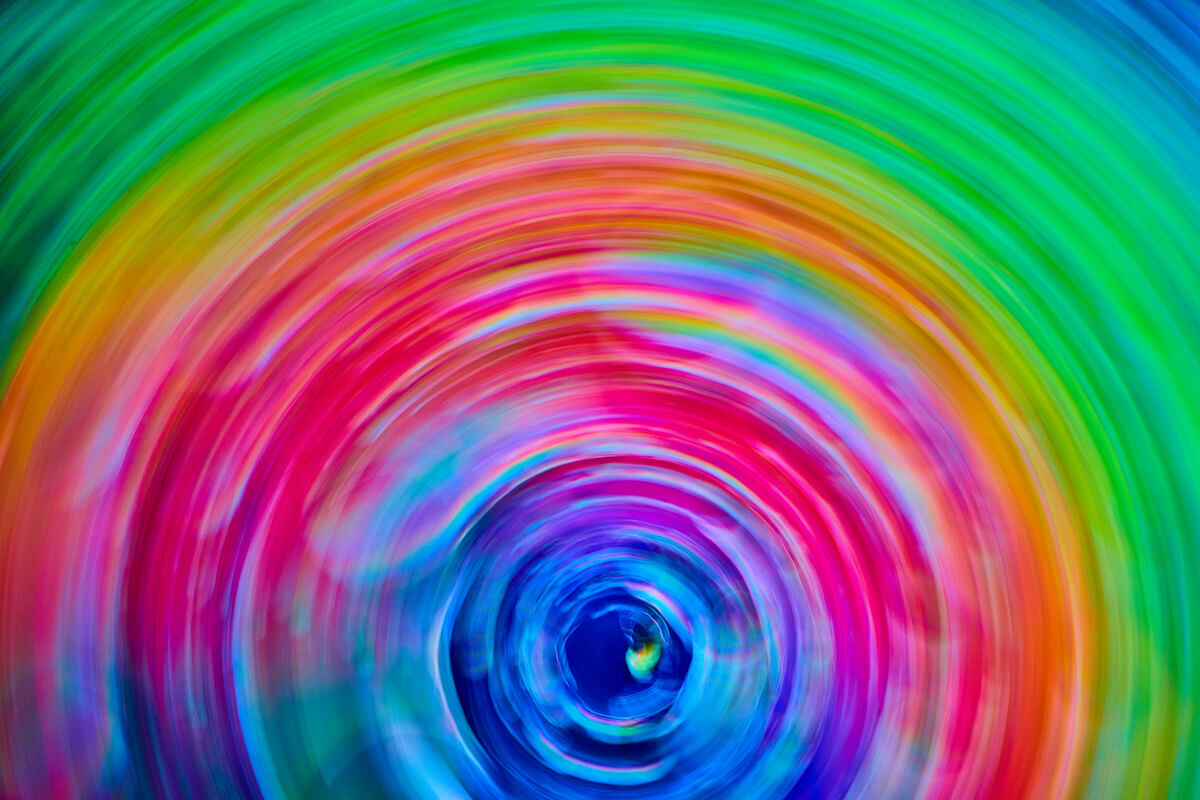
90 Degree Rotate
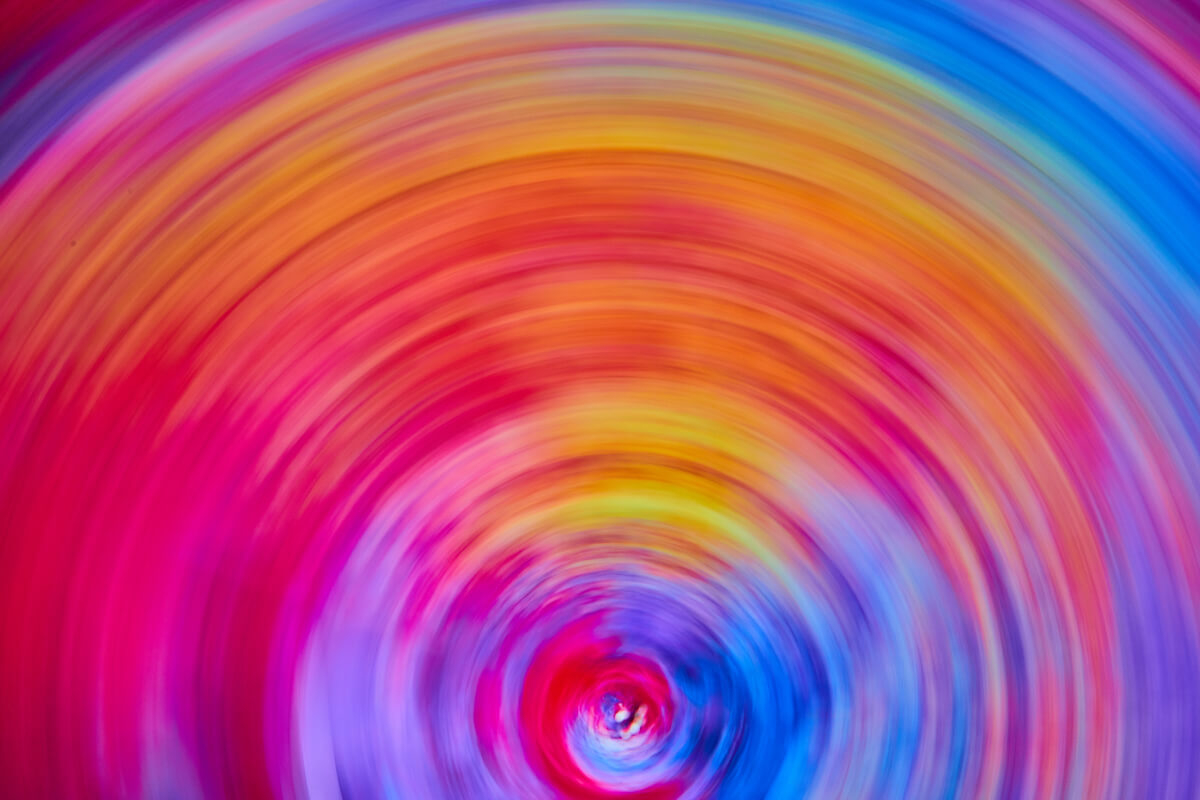
90 Degree Rotate
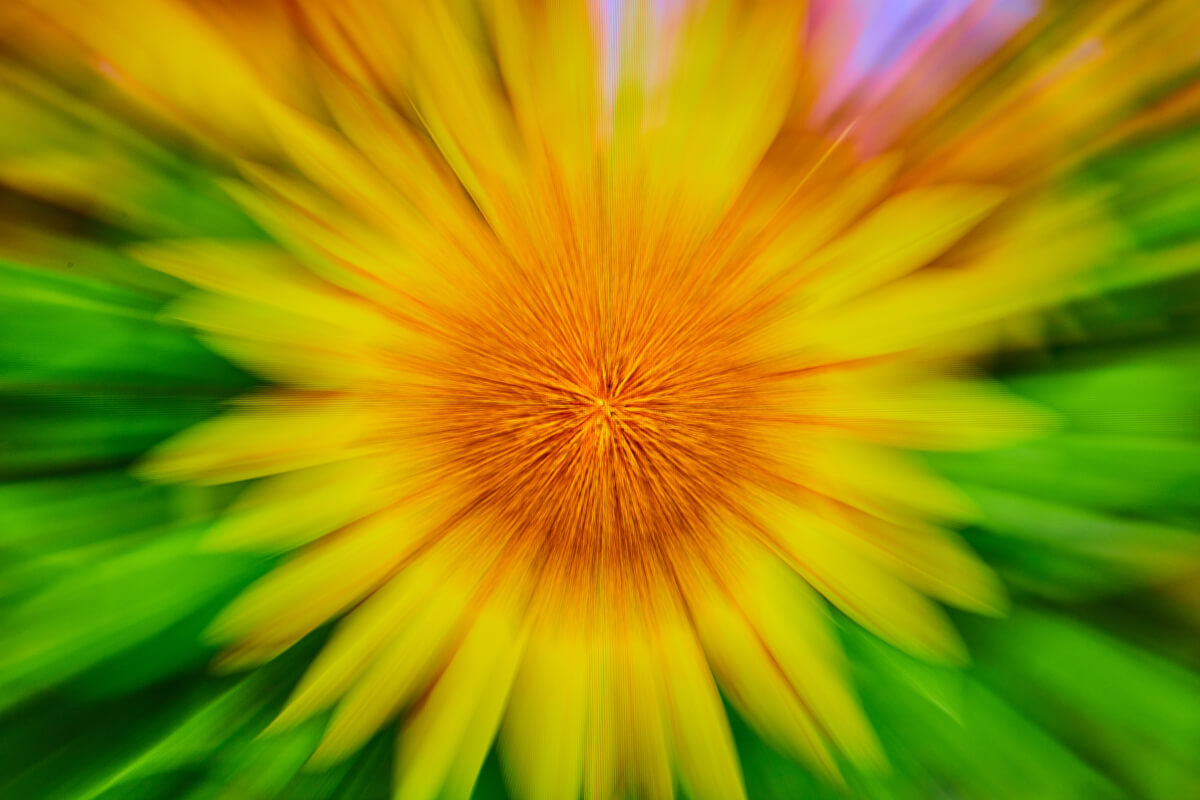
Zoom in on sunflower
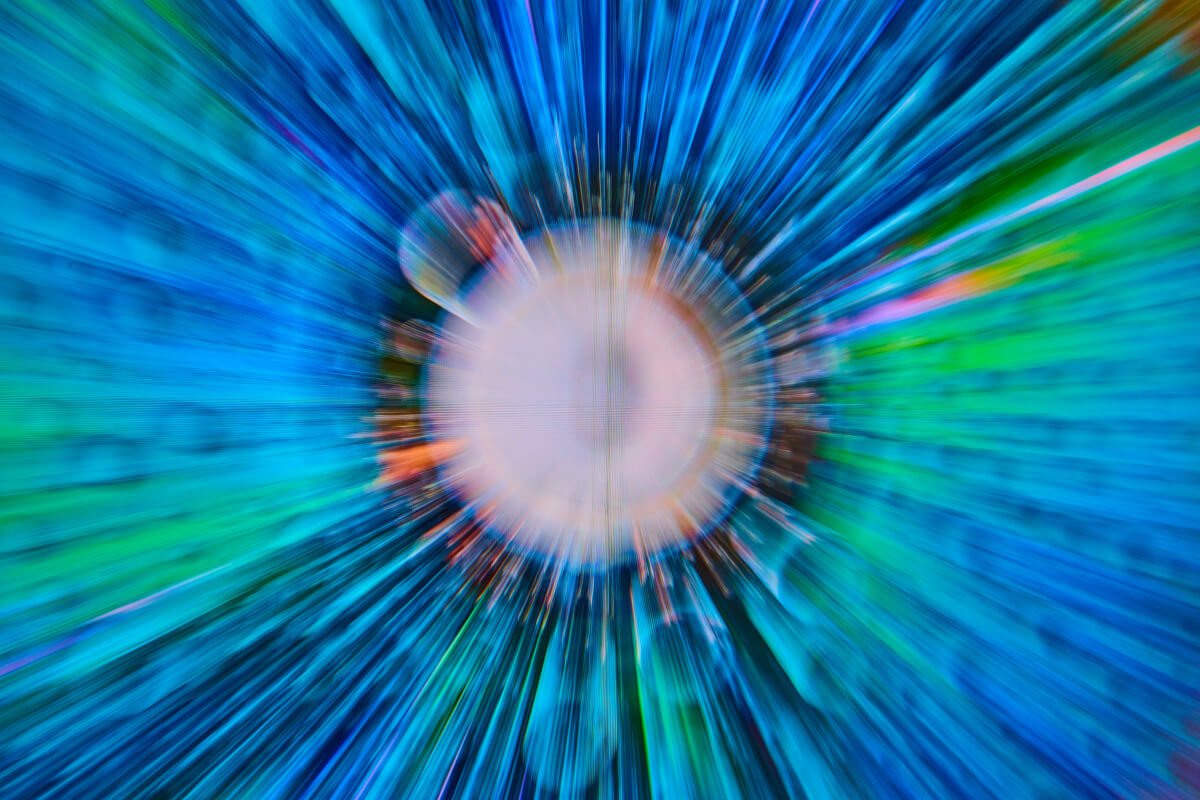
Zoom in on CD Water Drops
4. Mirror Image
Let’s take a break from the camera and head over to photoshop and have fun repurposing some old images! I actually got this idea from @otherhappyplace on Twitter. In their words, “If you take pictures of the forest and sorta duplicate it vertically, you get these weird sorta nonsense spaces I find interesting”. I did agree, in fact, that the results were very interesting!
So, I dug through my collection and created a couple of my own:
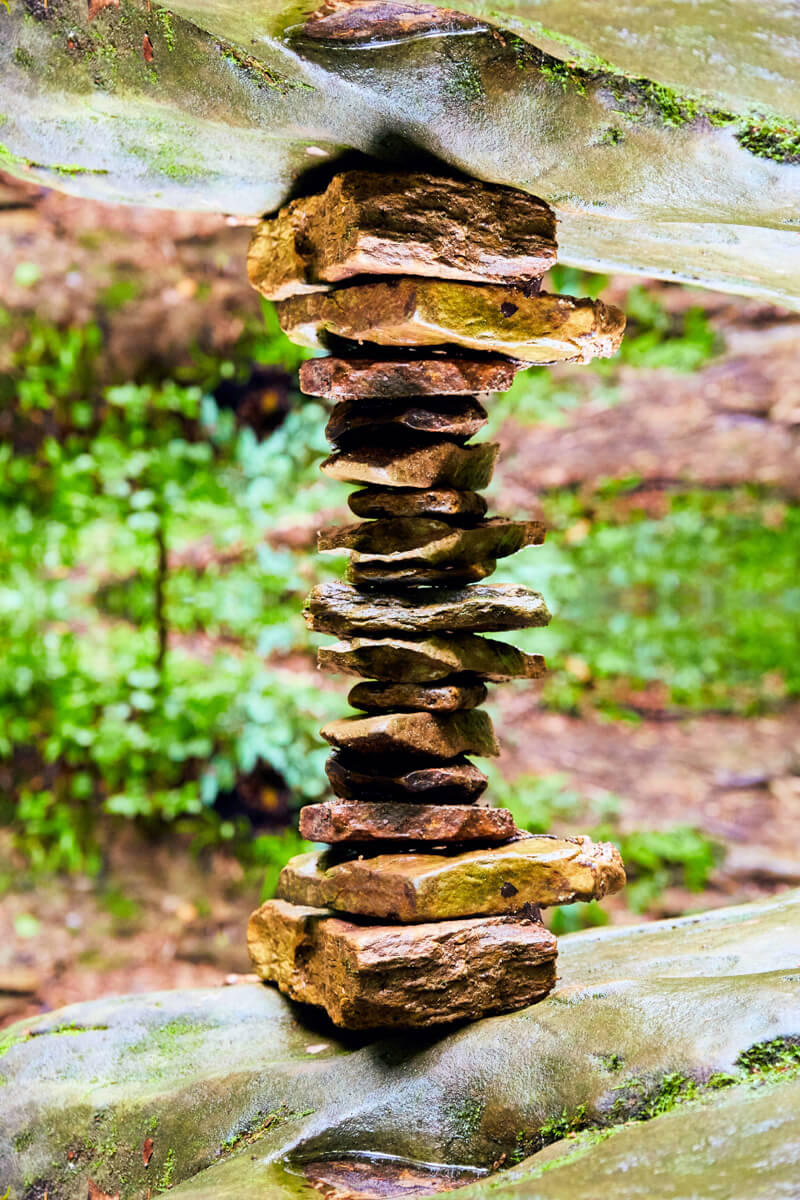
Endless Rock Stack

Roads in Redwoods

Roads in Yosemite
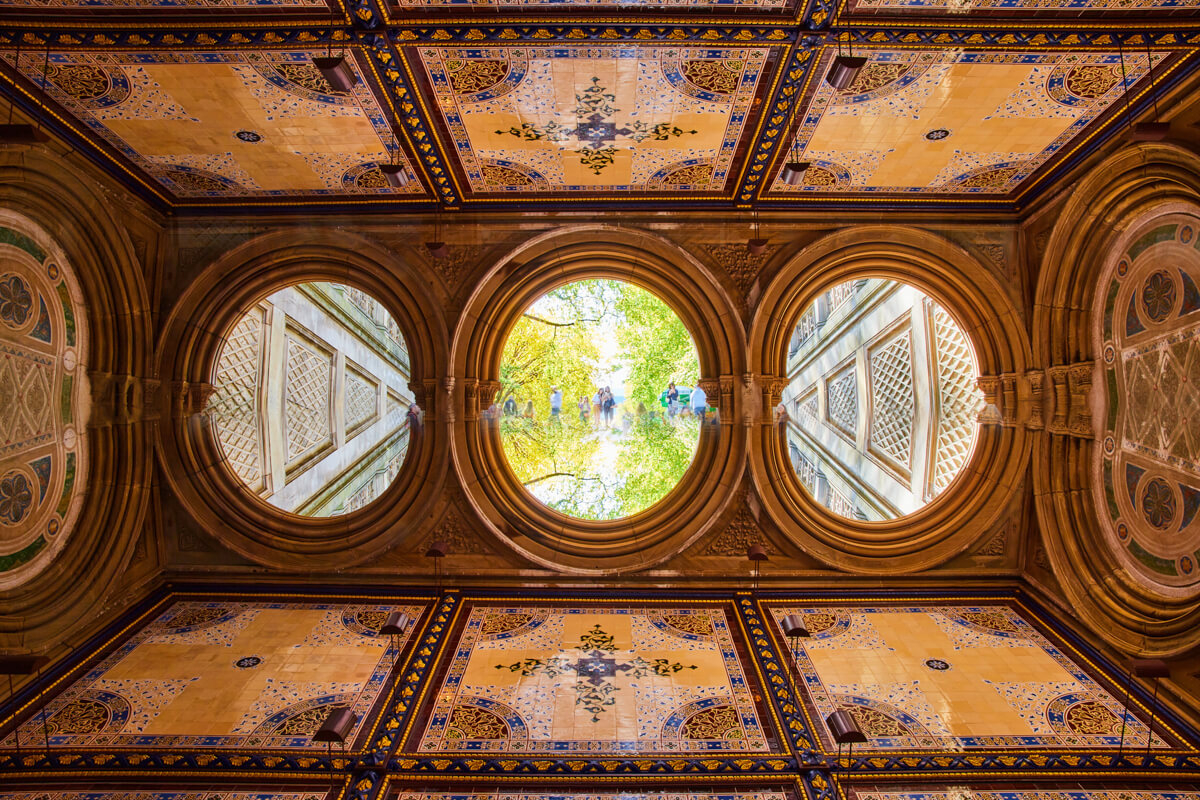
Central Park, New York City
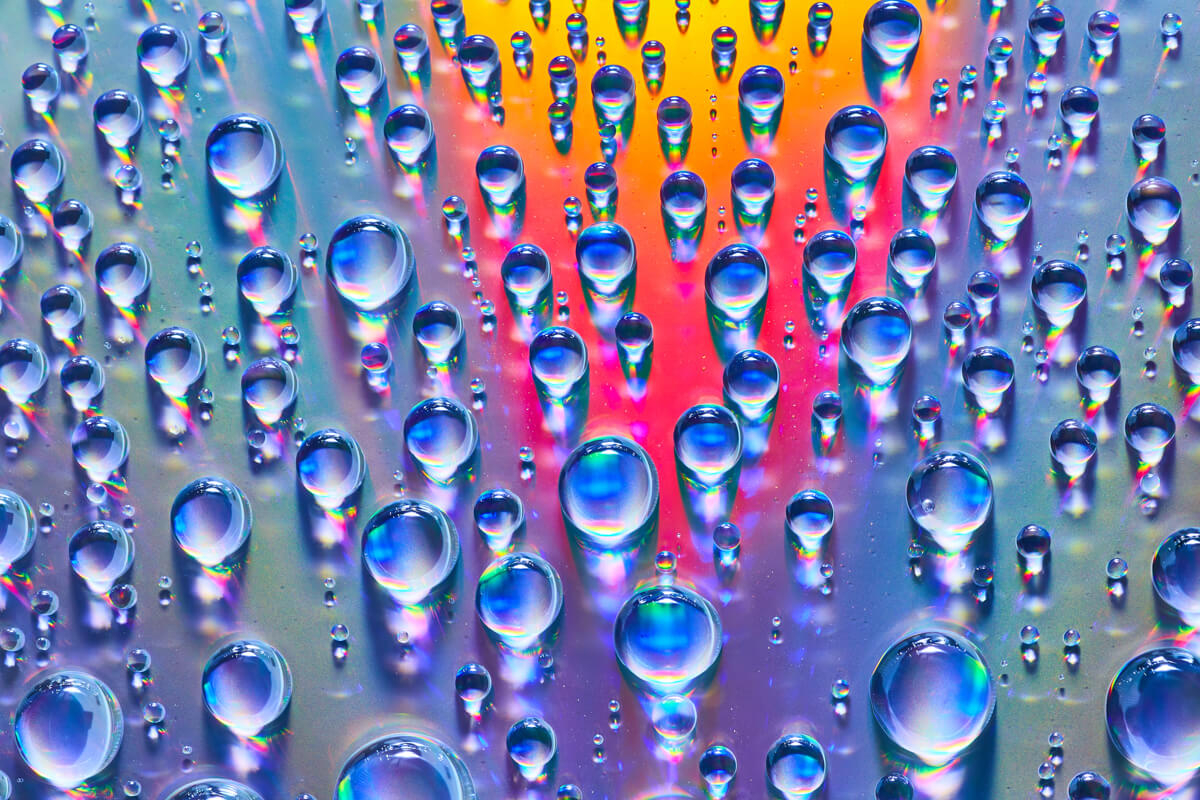
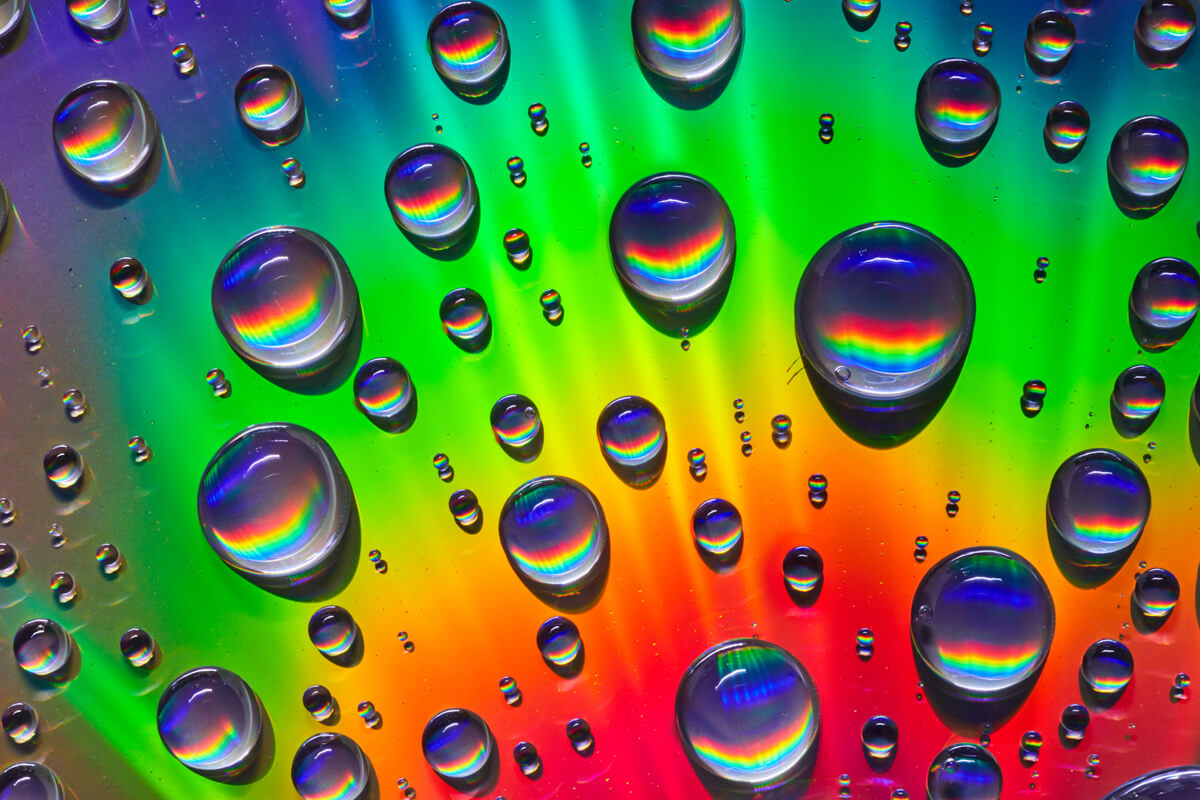
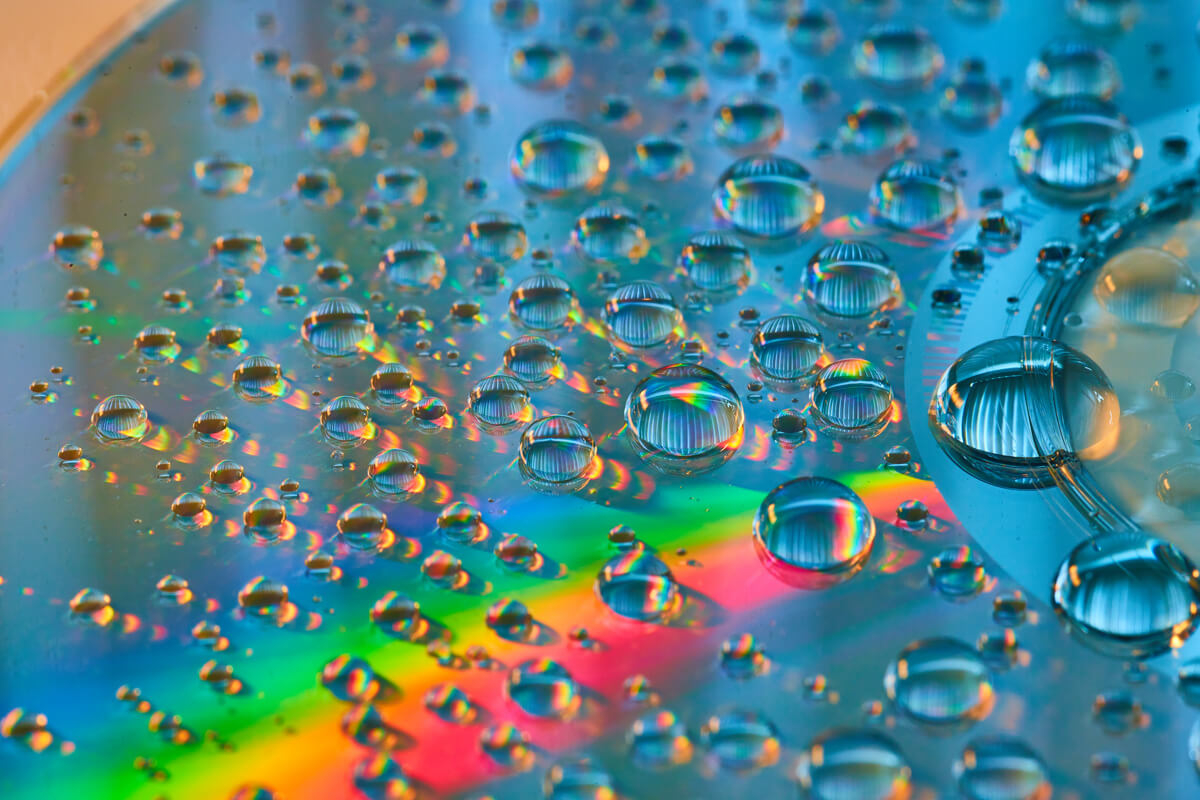
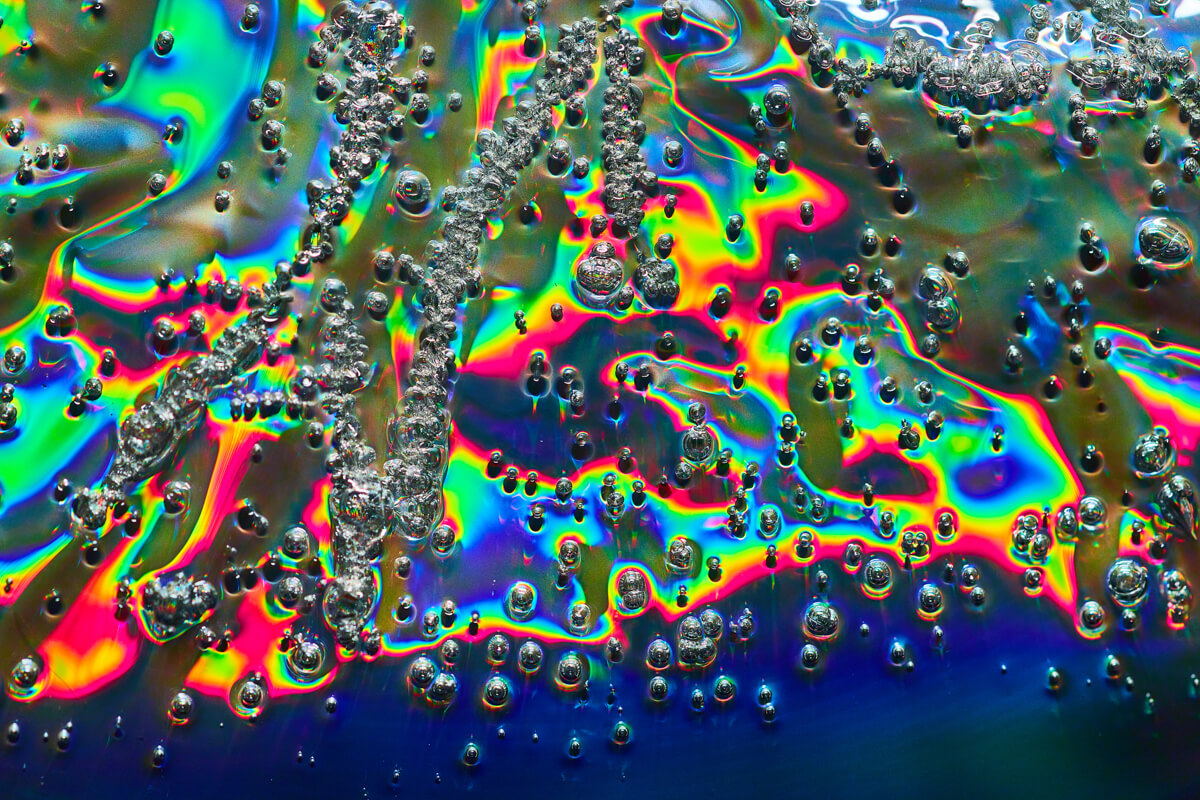
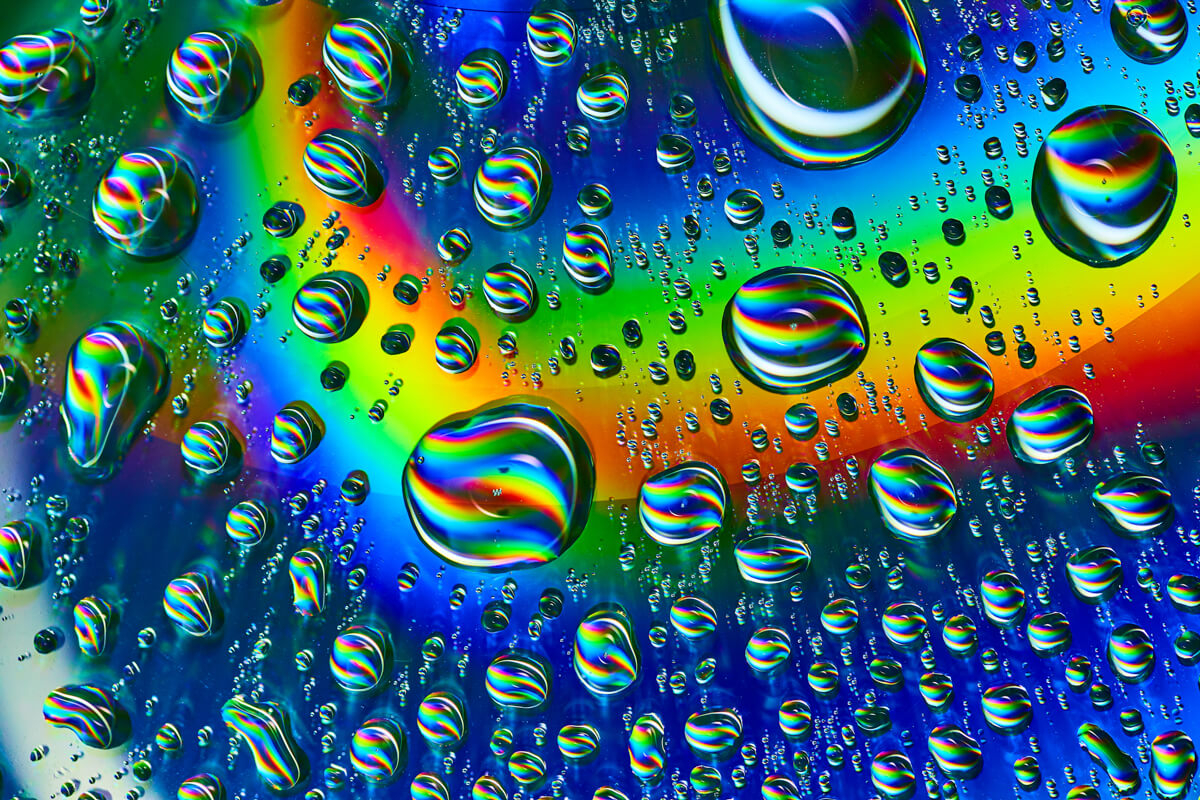
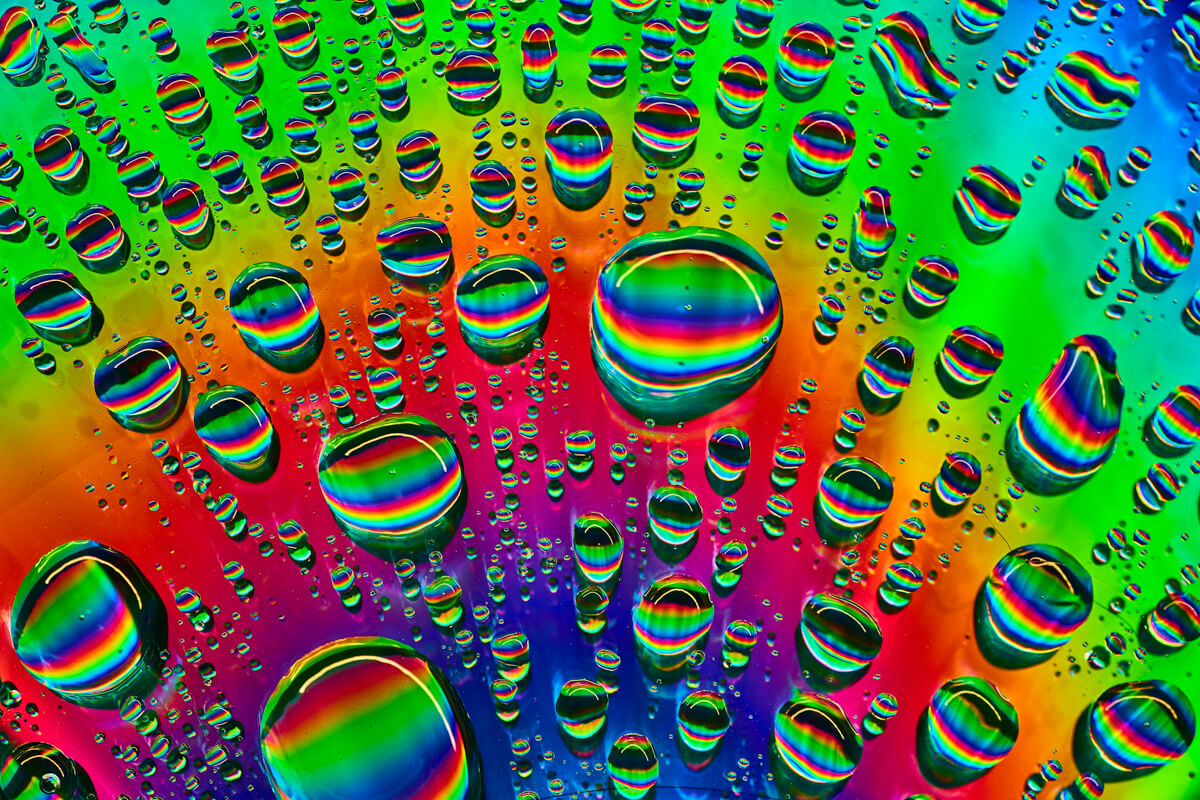
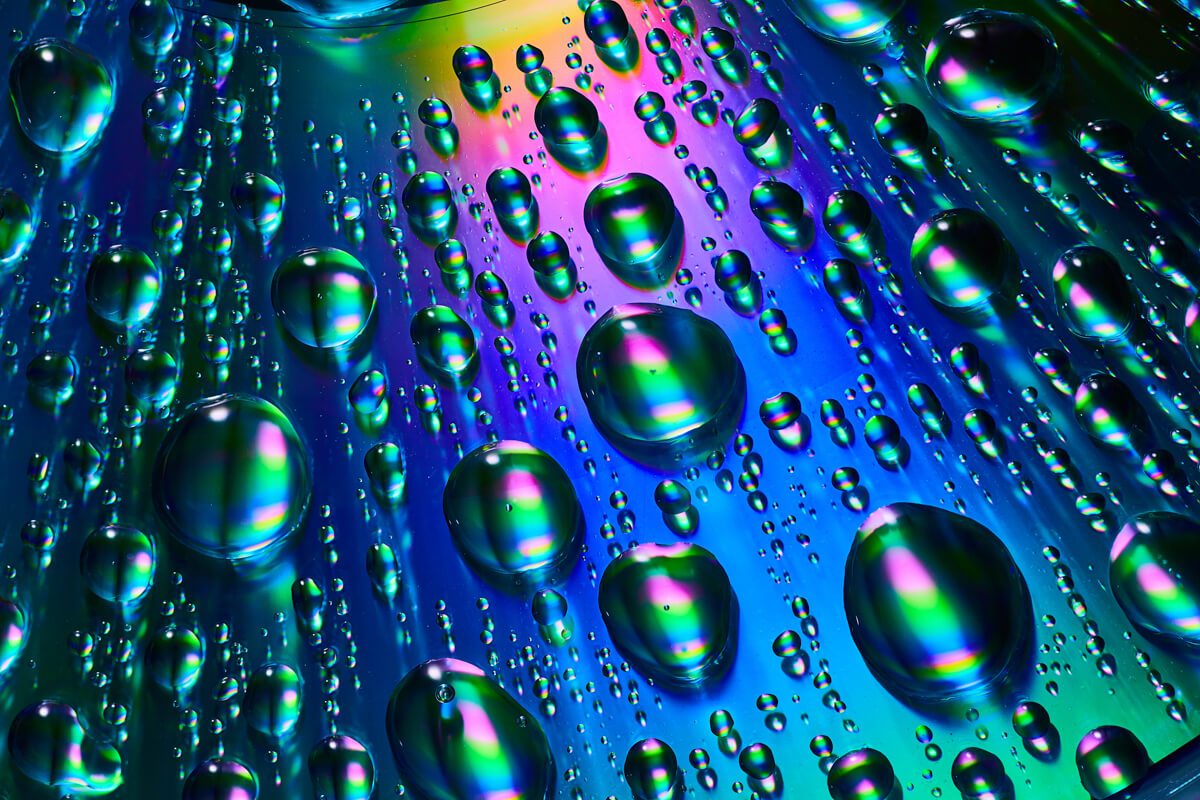
5. CD Rainbows and Water Drops
I’ll admit, I find myself a big fan of really colorful images and also abstract images. This is another SUPER simple project you can do with your macro lens to capture stunning colorful abstract images, using ancient technology - CD’s (or DVD’s)!
Just place your disk on a flat surface in a completely (or nearly completely) dark room. You’ll want your camera on a tripod as these will be long-exposure images. You’ll know your room is dark enough if you can’t see much reflecting off the disk.
Now, take a light source like a lighter or flashlight and play around with pointing it around/at the disk at different angles. I found a relatively low angle worked best. You’ll see you can reveal a whole rainbow of colors on the surface! You can then take photos messing around with moving your light source during the exposure. Some of these are actually composite images, as the rainbow effect would only be in certain regions, so I combined them to fill the entire shot.
Last, you can take a spray bottle and mist the surface to create reflective little drops that can show the entire rainbow in every drop! I did find the results after doing the water drops once on a disk and then cleaned/dried the disk didn’t work as well the second time (not being symmetrical as much). I am not sure if maybe a protective coating got removed or something, but it did seem like you just get “one chance” per disk to capture perfect water droplets.
BONUS (with caution) - I tried melting the surface of the disk as well to see the distorted results. Use caution as the burning-disk fumes are likely NOT something you want to inhale. I burned my disk outside and left it there to fully cool before taking photos of it briefly inside.
Angle of mystical drops
Full rainbow composite
Showcasing CD with sliver of rainbow
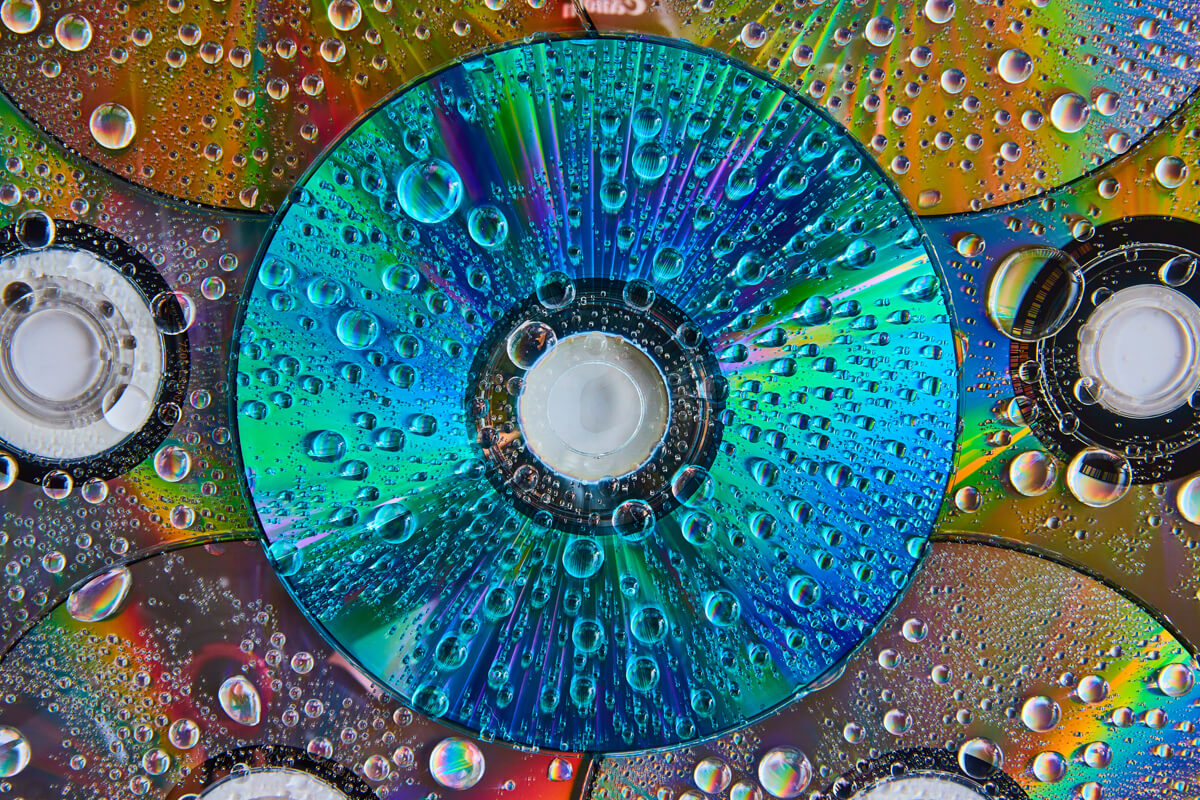
Straight on with multiple CD's (the center disk IS blue naturally)

Detail of drops/rainbow on disk
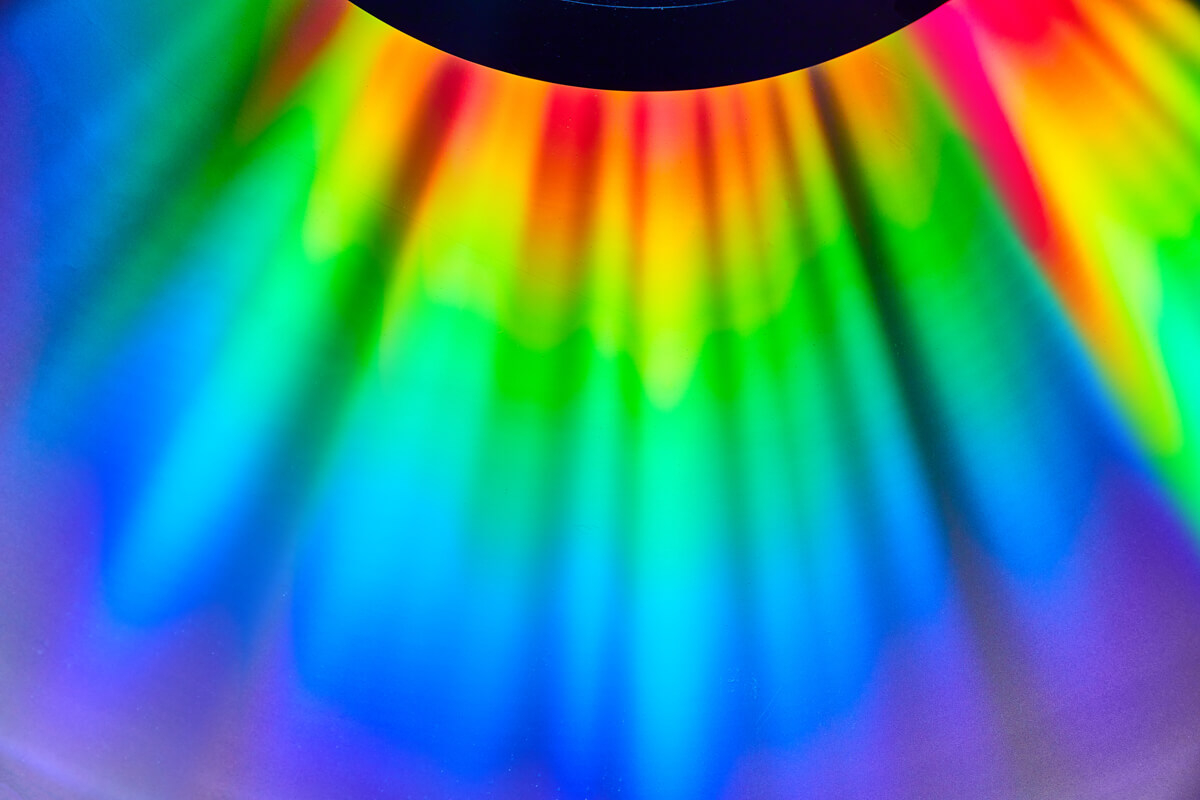
Rainbow lights
Melted disk results
Abstract wave of light
Hypnotic rainbow composite
Interstellar drops with cooler tones
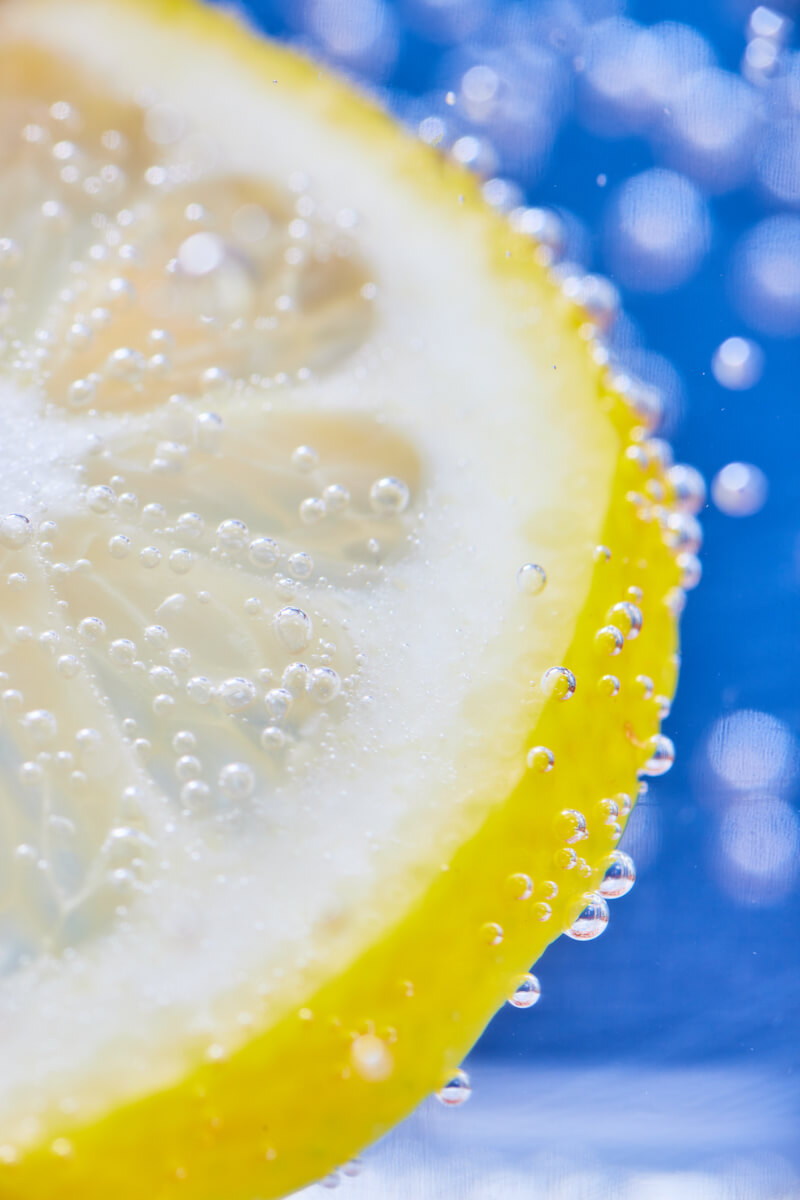
6. Citrus Fruits and Carbonation
You bought the fruit, you’re already going to eat it, you might as well take some photos! I felt inspired to slice up a bunch of lemons, limes, and oranges and lay them flat on glass to create some backlit images with a studio light, as well as a chance to get some fun macro shots.
A whole different idea was to mess around with carbonated water, which resulted in a bunch of tiny bubbles sticking to the surface of the objects inside. Fill a clear flat container with your carbonated water and set a skewered fruit slice inside to see the bubbles collect and create very fun images!
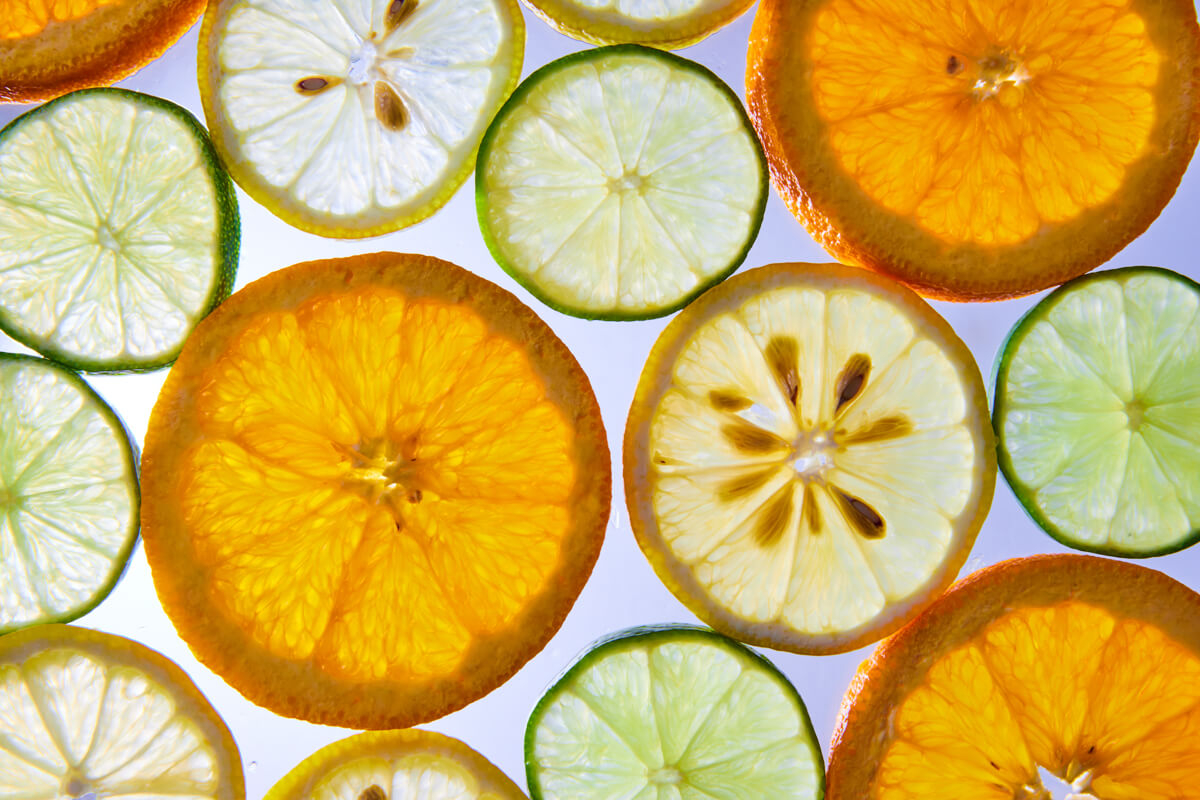
Backlite on lemons, limes, and oranges
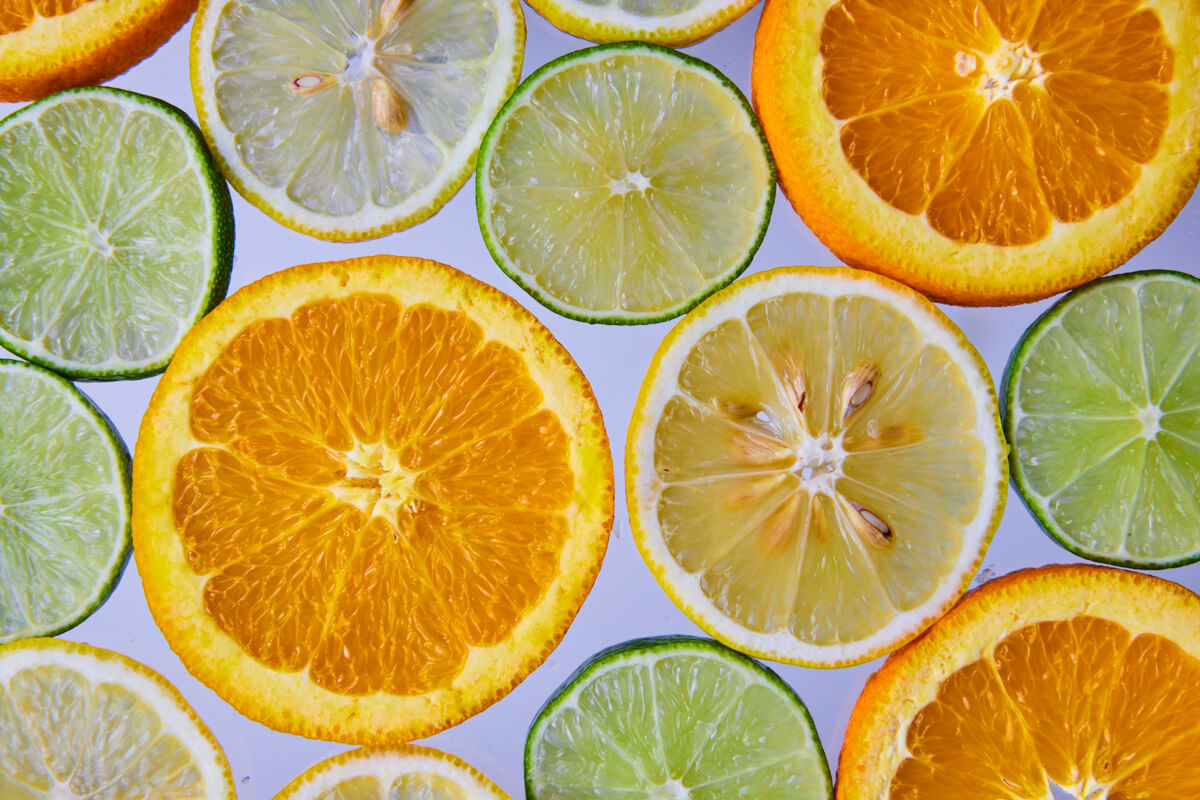
No Back Light on lemons, limes, and oranges
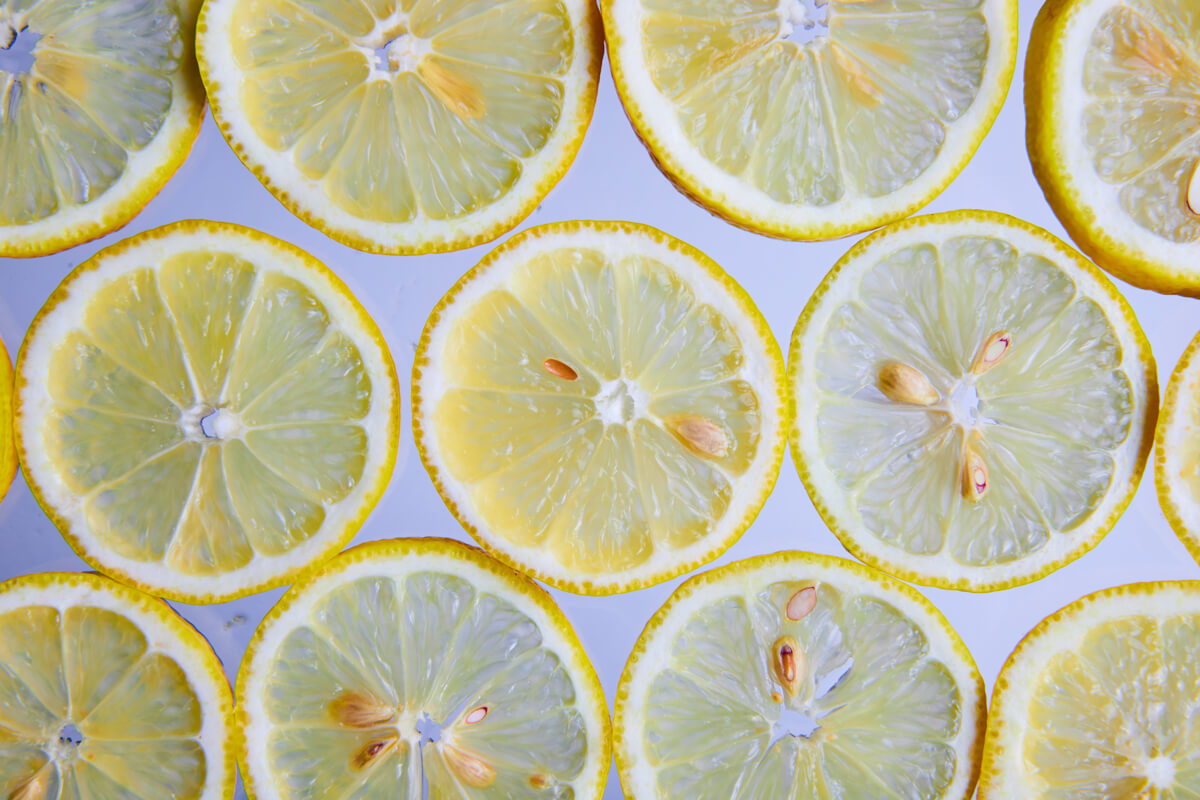
Detail of Lemons

Lemon in glass with carbonated water

Detail of bubbles on lemon slice
Super detail of carbonated bubbles
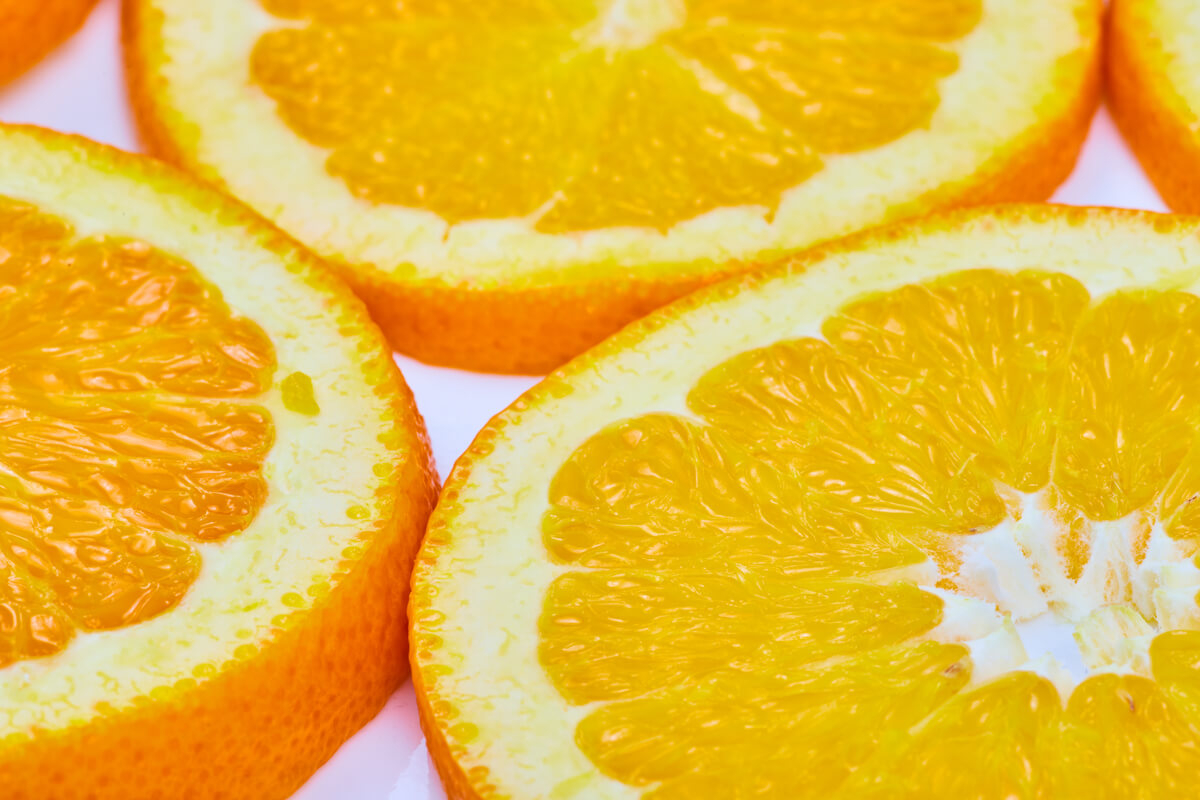
Macro on orange slices
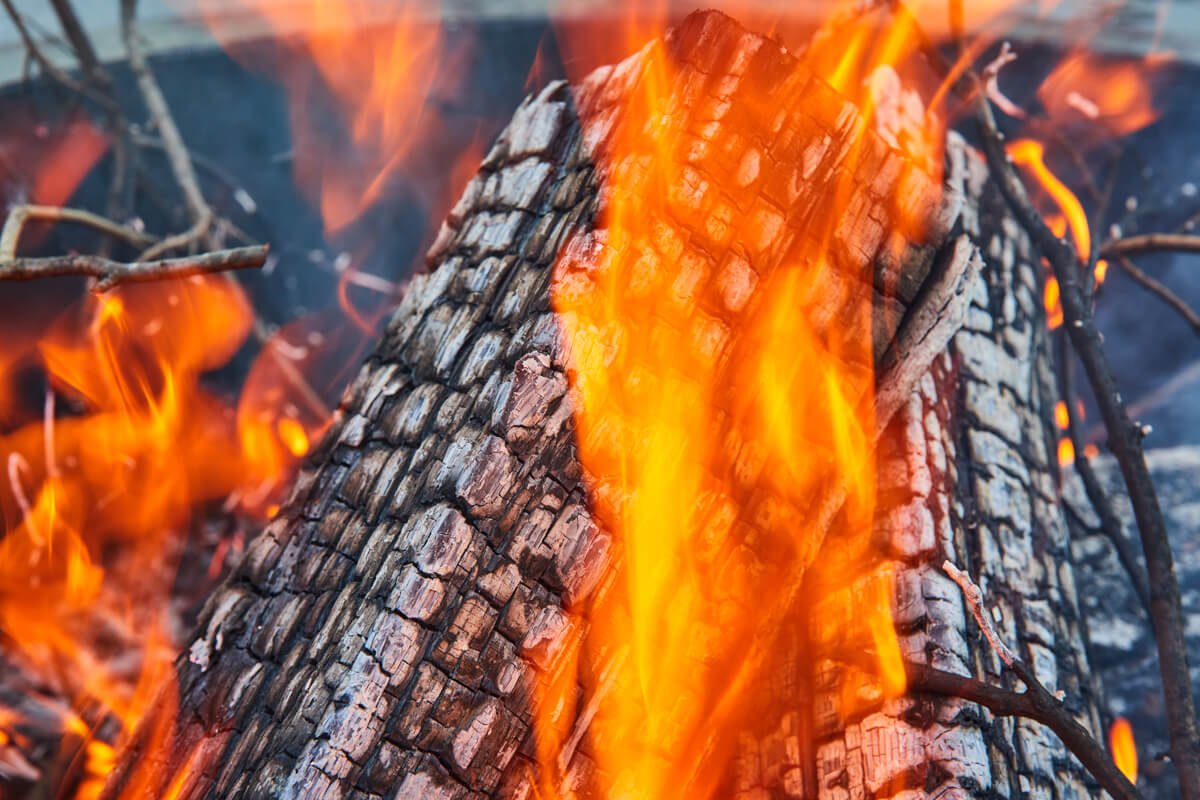
7. Fire Pit details
Last one for you, head to a firepit, if you have one, and take advantage of the burning wood and embers to capture some fun detail shots. Just be mindful of how close you get and how warm your lens is, as you don’t want it to become damaged or melt! I found myself getting pretty close and taking breaks for my lens to cool off.
Detail of burning logs

Up close to log

Long exposure of flames

Wider shot of fire pit
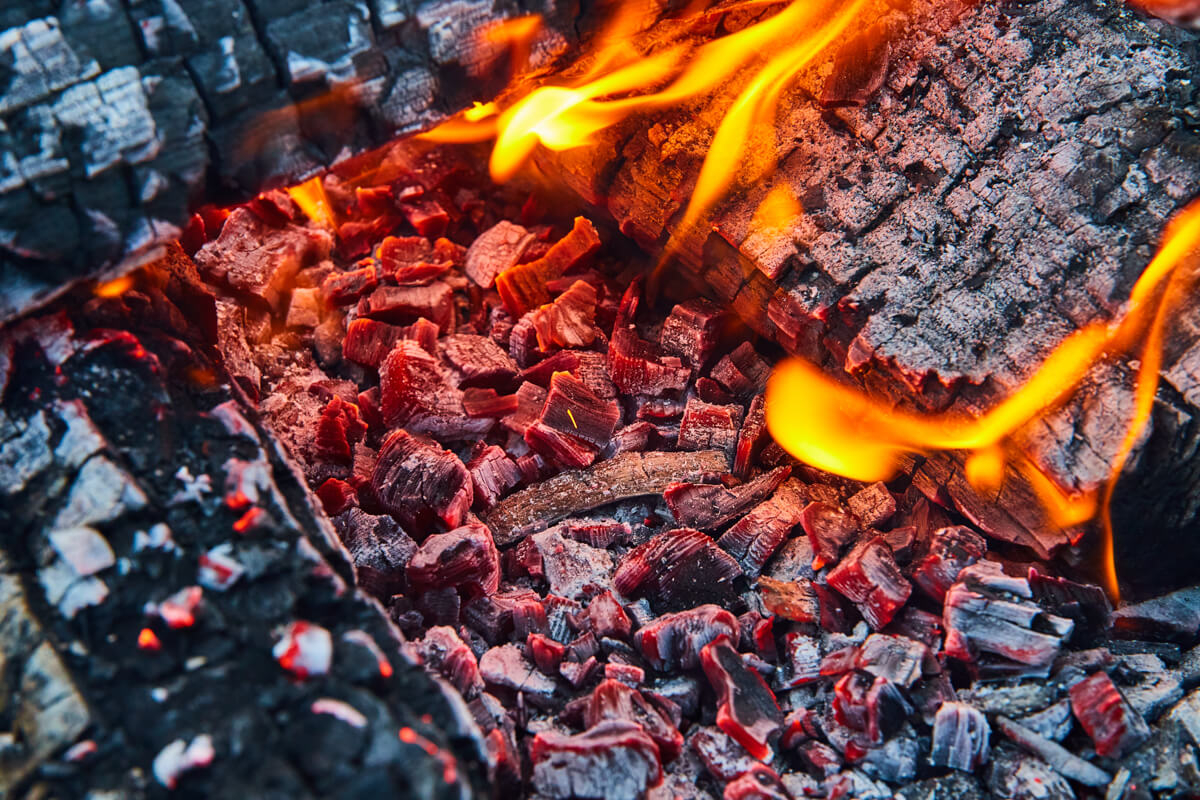
Ambers burning
Which is your favorite?
So, those are my 7 newest ideas for fun and easy photography projects at home! Let me know in the comments below if you’ve tried any of these, which is your favorite, or if you have an idea for us to try that we didn’t mention!
If you’re looking for more creative projects, browse our Creative Projects category of our blog for plenty of ideas - from steel wool and water drops to infrared and macro photo ideas.


About the Author
Founder and visual artist, specializing in all aspects of a businesses presence from imagery and video to graphics and web. A graduate of IPFW with a Bachelor in Fine Arts, Concentration Photography as well as an Associates Degree in Business. His personal photography works are focused on landscape, travel, and aerial photography.